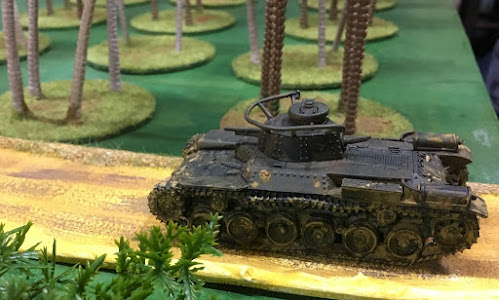
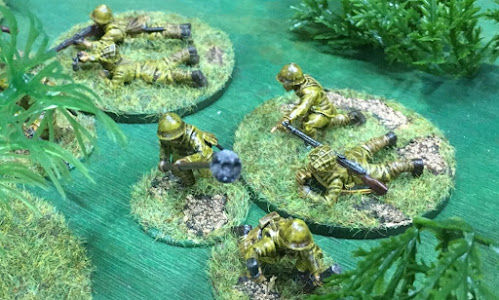
Having only recently tried Chain of Command, I am really taken by the rules. They pit WW2 platoons plus supports against each other. The rules are very quick to learn, but there is great depth to the play. And it appears that it will reward historical tactics. The platoons use the historical organisation, not an open-ended point system. Balance between different platoon types and nationalities is provided by different support levels. One figure, gun or vehicle represents one person, gun or vehicle. Games are typically 2-player although there is a free pdf called “Big Chain of Command” if you wish to play with multiple players per side.
The pint-sized campaigns are not
complicated and allow you to get stuck in quickly without lots of upfront record keeping. They usually have good historical background. There is a base pdf called
“At the Sharp End” which provides the general guidelines used or modified by
each of the pint-sized campaign pdfs. It even shows you how to put a campaign
together. This pdf is available at low cost from the TooFatLardies website shop.
To keep things simple the campaigns use a ladder system. This is where the battle locations (tabletop) are like the rungs on a ladder. The winner pushes the loser to the next rung. A draw will usually require a refight at the same location (rung).
To keep things simple the campaigns use a ladder system. This is where the battle locations (tabletop) are like the rungs on a ladder. The winner pushes the loser to the next rung. A draw will usually require a refight at the same location (rung).
Having played just 2 games of
Chain of Command and having watched several great YouTube videos by
TooFatLardies and the guys at Tabletop CP, I decided to launch into a campaign.
My friend Leith was also keen, having played Chain of Command for many years.
ON TO SINGAPORE
Twice a year the TooFatLardies
produce a special magazine with articles on scenarios, rules variations,
background information and campaigns for their various games. In the Christmas Special 2015 was
a Malaya 1942 campaign by fellow Australian Len Tracey. Len is very
knowledgeable about the Pacific war, particularly Australian and Japanese
organisation and equipment. You can find more of his wisdom in the Chain of Command forum.Given the historical outcome, this might at first thought appear a poor choice for a campaign. But closer reading showed how near the Japanese force was to running out of supplies including ammunition, fuel and food. Travelling light so they could travel fast, the Japanese showed they understood the concept of blitzkrieg.
Similar to the German challenge in Normandy, in this campaign the Australians are attempting to slow the rapid advance of their enemy to give time for reinforcements to arrive. The Japanese are trying to get to Singapore before running out of supplies. It is unlikely that the Australians can win this campaign by defeating their enemy. They win, draw or lose by how much delay they cause (or don’t cause) the Japanese.
This was an ideal choice of first
campaign for us. Leith already had painted figures for both Japanese and
Australians. Also, given Leith’s familiarity with the rules, it was an ideal match
for him to take the experienced Japanese troops and for me to lead the less
experienced Australians.
If the Japanese lose a battle,
they throw in a new platoon for the next battle. If they win a battle, they use the same platoon again, but get replacements
which will keep them closer to full platoon strength.
The Australians get very few
replacements, so have to conserve their platoon. This might have them
withdrawing early from a game (even one they are winning) because they are
taking too many casualties. The Japanese cannot stop and consolidate. They must continue to attack. Usually if they fail in a battle, they will need to fight that battle again at the same location. There is a limited chance of a counter-attack by the Australians if they win in certain locations. This will push the Japanese back one rung, causing further delays, but then after that battle the Japanese will resume the offensive.
Further balance is provided by the Japanese getting a -1 modifier to the dice when rolling on the “A Bad Thing Happens” table. A roll on this table occurs when a leader is wounded or killed, a team or section breaks or is wiped out, a support such as a tank or anti-tank gun get knocked out and other bad things.
A die is rolled to see how much this event impacts a sides Force Morale. A side is defeated when their Force Morale reaches zero. Force Morale typically starts at 8 to 11 points. Each roll on the “Bad Things Happen” table will reduce the Force Morale by 0, 1 or 2 points.
With a -1 on the die roll, the Japanese have a greater chance of not losing any Force Morale points when a bad thing happens. So they will stay in the fight longer. This is a simple but effective way of reflecting the confidence in winning they had at the time. And makes it harder for the Australians to win a long grind. This encourages historical hit and run tactics against the Japanese.
So the table will likely be different each time. Len Tracey has provided guidelines on how to set up the tables and detailed rules for each of the new terrain types found in the Asia-Pacific area. Very handy for anyone writing a campaign in this theatre of the war.
THE CAMPAIGN BEGINS
Leith had some jungle terrain, although with jungle you can always do with more. I ordered trees from China and found some plastic bushes on special in the local big chain hardware store. Lucky timing as these are not always stocked.
Whilst I set out to make more jungle terrain, we decided we would not wait. Being keen, we just wanted to get started with the campaign. Playing would also provide an incentive to finish making more jungle quickly. So expect to see thicker jungle as the campaign goes on.


No comments:
Post a Comment