Leith and I kicked off the Malaya 1942 campaign for Chain of Command, published by TooFatLardies in their Christmas 2015 Special pdf.
The first battle location in the campaign is based around Scenario 1 from the Chain of Command rule book, with some appropriate modifications. This scenario has the two armies probing to check the strength and location of the opposition. The scenario is won by one side forcing the withdrawal of the other.
The Australians are trying to utilise a blocking position in a defile against the Japanese; but have had little time to prepare due to the rapid Japanese advance. Blitzkrieg at its best.
MAP
 |
| Malaya 1942 Campaign - Map - Turn 1 Battle 1 |
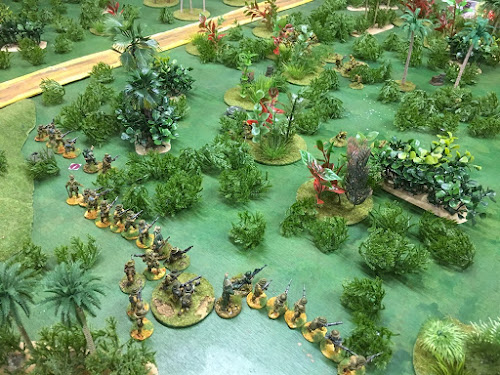
The table was to consist mostly of Primary Jungle, with a road down the middle. The road ran through a defile, which made a good ambush position. There were 2 rolls required on the campaign scenery table. For us these proved to be:
- Rubber plantation. We then rolled randomly for size – 24 x 24“
- Bamboo forest. Rolled randomly for size - 13” x 13”
So the plantation would have the main road either along one edge or through the middle of it. We also decided that the plantation would not be on the defile. The dice rolling worked out fine. No adjustment of position for the rubber plantation or bamboo forest was necessary.
Above can be seen the resulting map. The dotted lines show the hills that create the defile.
SUPPORT
Japanese support
- Leith decided it was appropriate to take a tank as support to represent the Japanese use of armour in this campaign. All he could afford was a Type 95 Ha-Gō light tank as support for his infantry platoon. Armed with a 37mm main gun and 2 x 7.7mm type 97 machine guns, the armour is not very thick. It has a crew of 3: commander, hull machine gunner and driver. However, it is still a tank!
- Vickers MMG team with 5 men. For some extra firepower.
- Boys anti-tank team with 2 men. I decided to take an extra team to supplement the standard platoon one, since these teams are quite fragile and the only anti-armour in the force at this stage. This was just in case any tanks should appear.
PATROL PHASE
Chain of Command starts with a patrol phase before any troops are placed on the tabletop, to determine where your jump-off points will be. These points are where you are able to deploy troops when you get the right command roll and are also ready to bring on a team, section/squad or support option.
Both sides started with 3 patrol markers on the road at their respective edges and pushed forward quickly. The Australians locked down the Japanese patrols quickly to ensure they did not obtain a deep outflanking position. In the early part of the war, the Japanese are allowed to move their patrol markers further each turn, recognising that their doctrine stressed mobility and flank attacks.
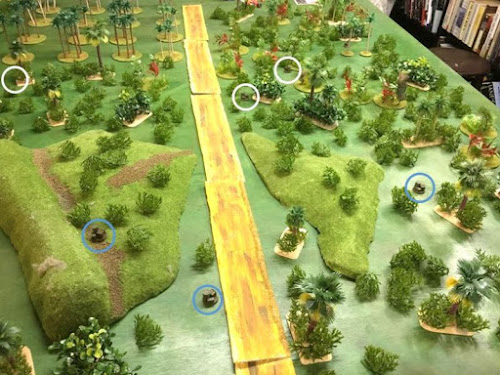
In the photo the 3 white circles show the position of the Japanese jump-off points and the 3 blue circles the Australian jump-off points.
BATTLE
Turn 1 Phase 1
- The Japanese started with the initiative, bringing in a mortar team and a senior leader to the east of the road.
- The Australians were able to bring in 2 Junior Leaders with their sections to the east of the road, trying for an early advantage. Both sections were placed on overwatch.
Turn 1 Phase 2
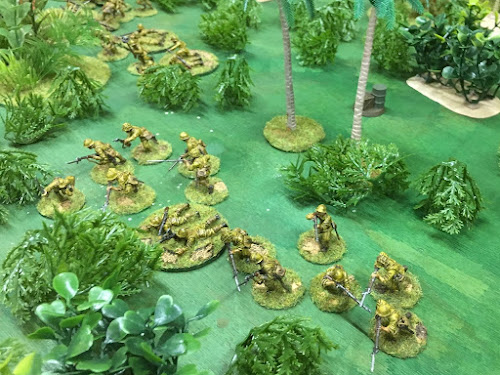
- The Japanese 1st and 2nd rifle sections jumped off about 15” from the Australians but did not spot them, so could not fire on the Australians. Peering through the trees the Australian 2nd section saw both Japanese rifle sections and conducted overwatch fire; inflicting an impressive 3 dead plus 3 shock on the Japanese 1st section (ouch) and 1 pin on the 2nd section.
- In the primary jungle the visibility is 12” + 1d6”. The Japanese rolled a 1 and a 2, the 13” and 14” not enough to spot the Australians. The Australians rolled a 4, so their 16” visibility for this phase allowed them to fire at both Japanese sections.
- Both Australian sections moved tactically and fired (with half dice) trying to press their early advantage. The 1st section was now just within 12”. This not only guaranteed visibility, but also brought the sub-machine gun (SMG) within range.
- The Australian 2nd section rolled a 5 for visibility. This resulted in more impressive fire, with 4 more Japanese casualties and a Junior Leader unconscious. This brought the Japanese 1st rifle section to around half strength already.
- The Australians brought in their 3rd rifle section to pile the pressure on, deciding to press the advantage rather than finessing.
Turn 1 Phase 3
- After a slower start for the Japanese, Chain of Command points were now 4 for both sides. When you get to 6 you are allowed to spend it on special actions. you do not have to do this straight away, and can even save more that one Chain of Command (CoC) die until later in the game.
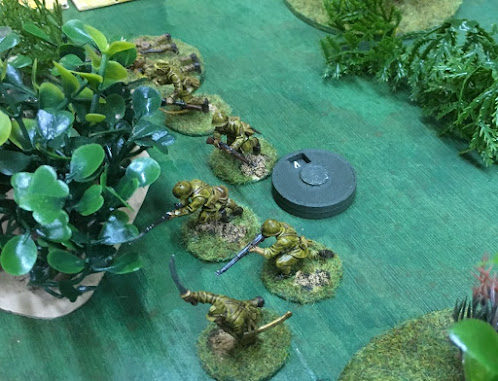
- The Japanese knee mortars were called in by their 1st rifle section. They opened up on the Australian 1st section, shredding the canopy as the shells rained down but doing little else. The distraction allowed the Japanese 1st rifle section to inflict a kill on the Australian 1st rifle team, 2 shock on the Bren team and a wound on the Junior leader who was instructing the Bren gunner. The men were unfazed by his wound (rolling a 1 for ‘Junior Leader wounded’ on the ‘Bad Things Happen’ table).
- The Australians rolled 3, 3, 6, 6, 6 for command. The triple 6 meant end of turn after this phase, which had no effect on either side at this point of the game. End of turn will remove any smoke, overwatch markers, some pin markers, re-awaken unconscious leaders and rout any still broken units.
- The Australian 1st section fired and the 2nd section moved tactically then fired at half effect. The result of all this was only 1 shock on the Japanese; so no significant benefit.
Turn 2 Phase 1
- Australians started the first phase of the new turn because they had rolled the triple 6 in the preceding phase. They rolled 2, 2, 2, 4, 5 for command. They were now up to 5 on their CoC die.
- Firing at Japanese 1st section gave 1 dead, 1 shock and their Junior Leader out for the rest of the turn. Once again, no bad thing happened. Both sides had been rolling 1’s for the wounds on their leaders so far, avoiding any loss of Force Morale points. Perhaps the jungle had stopped the men from knowing about the hits on their leaders.
- The Japanese 1st rifle section was now pinned. This means they accumulated shock points double or more the number of men left in the team or section/squad. Units that are pinned cannot move, fire and fight at half effect, but count as if in one level of cover higher due to hugging the ground.
- With a 1, 1, 3, 3, 6 for command the Japanese shot well; causing 2 dead, 2 shock and a wound on the leader of the Australian 1st section. Also 2 dead in the Australian 2nd section.
- Despite this success, with the Japanese still feeling behind in the firefight, their 3rd rifle section came in to try and tip the balance.
Turn 2 Phase 2
- The Australians rolled 5, 5, 6, 6, 6 for command. A Chain of Command dice complete and a second one started.
- The triple 6 again meant end of turn after this phase. Unfortunately for the Australians, all it did was allow the Japanese 1st rifle team leader to regain consciousness! All the double and triple 6’s rolled by the Australians had not amounted to much so far.
Turn 3 Phase 1
- With another phase, the Australians rolled 1, 5, 5, 6, 6. Chain of Command dice mounting up for them, but otherwise nothing could be done.
Turn 4 Phase 1
- Starting turn 4, the Australians rolled 1, 2, 2, 5, 6. Yet more Chain of Command points, but the Australian commander was not sure how best to use them at this stage.
- The Australians continued to tactically advance their squads alternately. The overall fire was effective, adding more kills and shock on the front two Japanese rifle sections.
- The Japanese 1st section broke and retreated deep into the jungle, well out of sight. The leader of the 2nd rifle section was wounded. Japanese force morale was now down to 8, but a long way from being a problem.
- The Japanese finally got to act after the multiple Australian phases. With a 1, 2, 3, 4, 4 both senior leaders were brought into play. This was to try and give the attackers more flexibility in command and quicker removal of shock. But their firing was lacklustre, only causing one casualty in the Australian 1st section Bren team.
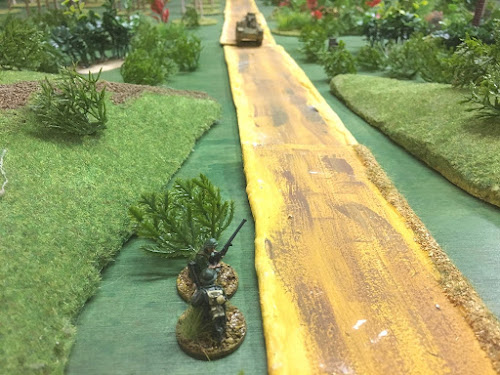
- Leith brought in the Japanese light tank at the start of the road, representing a scout for an armoured column. Seeing this, I was glad I had spent some support points on a second Boys anti-tank rifle team.
Turn 4 Phase 2
- Despite all the shooting that occurred this phase, the result was ineffective from both sides.
- Leith raced the tank up the road. Unless the Australians could stop it leaving the area, they would have to withdraw.
Turn 4 Phase 3
- The Australian command roll of 1, 2, 2, 2, 4 allowed them to bring on the HQ Boys anti-tank rifle team. Lurking behind a jungle bush, they hit the tank 2 to 0, putting the MMG out of action for the game and 2 shock on the tank. A total of 3 shock would stop any further advance of the tank. 4 or more shock would result in the crew bailing out for the rest of the game. It is possible to reduce shock using the Junior Leader of the tank if they get to use the correct value of command dice.
- The Australian Bren and rifle fire did not hit many times, but it was enough. Although it only caused a few more shock and kills, it was a perfect storm for the Japanese. A rifle section broke. The already wounded Junior leader was killed and a senior leader was wounded.
- Japanese Force Morale was now at 4. They decided to withdraw, particularly as the Australians had a Chain of Command dice which they could use to end the turn and rout the senior leader attached to the broken rifle section. This would result in further loss of Force Morale.
CAMPAIGN IMPACT
A good start in the campaign for the Australians, stemming from some very decisive early rounds of fire from which the Japanese never really recovered.
Due to losing the battle, the main Japanese commander will replace this losing platoon with a new full-strength one. The losing Japanese platoon leader may not have much of a future.
Because the Australians won and had a significantly higher force morale, their casualties were reduced. Being left in possession of the battlefield, more wounded are able to be rescued and treated. The difference was high enough that the Australians did not lose any rank and file for the next battle.
However, with an Australian section leader a casualty, a fighting man would need to be promoted from the ranks to run his section. The Australians had no replacements available, so this section would be one man down. The inexperienced leader would have a smaller command radius and just 1 command point (instead of 2). If he survived the next battle he had a good chance of becoming an experienced Junior Leader. However, with only 1 command point he has a greater chance of becoming a casualty.
The Japanese would have to attack in the same location the next turn, but they could choose to fight away from the road in an attempt to find a way around the flank of the Australians.



Looking good and it's peaked my interest to have another look at the rules.
ReplyDeleteJust discovered this one, and it's looking good. I am assuming you have realised that double or more shock isn't pinned, it's broken? More shock than men is pinned.
ReplyDeleteIt's especially interesting as I am just about to paint up a force for Malaya, a Lanchester and some 2 Batt. Argyll & Sutherlands, as well as their opponents. But like you I suspect I haven't enough jungle. More aquarium plants required!