I really like the idea of some background to help flesh out the campaign. We did not have enough time at the end of the first game to roll for some of the campaign background and effects as listed in ‘At the Sharp End’ and Len Tracey’s ‘Malaya 1942 campaign’ rules. So we sorted it out between games.
JAPANESE PLATOON BACKGROUND
After their loss in the 1st battle, the Japanese replaced their platoon with a fresh one. So there was no need for background on that platoon. The new platoon was:
Rikugun (senior leader) Fujita-san - Thoughtful, average appearance, 25 years old. Sponsored by some senior generals into officer academy, so there are high expectations with a lot of pressure to succeed.
Gunsō (sergeant) Haregawa-san. Also 25 years old. A fisherman from a busy coastal village who was called up.
Rifle squad 1 leader Aoki-san. 27 years old. From the same fishing village as Haregawa-san, who pulled some strings to make this happen.
Rifle squad 2 leader Matsuda-san. 27 years old. An unwilling conscript, but has hidden this so well from his officers it allowed him to achieve promotion to squad leader. This conflicts him as he has pride in doing a good job.
Rifle squad 3 leader Kojima-san. 26 years old from an old samurai family that has become destitute. He hopes to die gloriously in battle to make his ancestors proud.
Grenade discharger squad leader Onishi-san is 25 years old. A veteran of the China campaign, although proud to serve, is becoming fatigued from long years of campaigning.
AUSTRALIAN PLATOON BACKGROUND
Rolling for the Australian force also produced some interesting results.
Lieutenant Kenneth Reid (platoon leader) is only 18 years old, but claims to be older and his superiors have not realised. He was promoted in the field less than a month ago, following the death of his commander. He has retained the position due to his tenacious leadership of this platoon at the battle of Gemas. He began this current campaign feeling ‘secure’ and has now improved to ‘sociable’ due to winning last week’s battle.
Sergeant Gary Turner is an experienced army man at 46 years of age. Originally a stockman, he has no problem sleeping rough.
Acting Corporal Brian Evans is the new section 1 leader, following the death of his predecessor in the first battle. He is 23 years old and was a bank clerk in civilian life.
Corporal Colin Moore heads up section 2. He was a city labourer in Sydney and was an early volunteer. He is 27 years old.
Corporal William Colling, leading section 3, is 26 years old and was a grocer’s assistant in Brisbane.
MAP
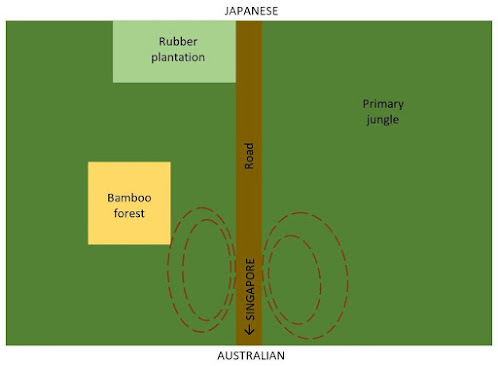
The battle was to be fought in the same general location as the first one. Leith had the choice of attacking in the same position or moving the attack to either flank. He chose to attack along the road again (was this an indication he wanted to use another tank?).
To provide some variety we decided to re-orient the tabletop as shown in the map below, so that flanking moves were more possible:
To provide some variety we decided to re-orient the tabletop as shown in the map below, so that flanking moves were more possible:
SUPPORT
Again we kept the choice of support secret from each other at the start of the battle.
Japanese support
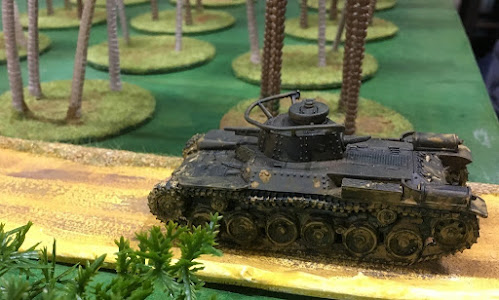
- Leith was able to afford a better tank; choosing a Type 97 Chi-Ha. This is a medium tank with a 57mm main gun and 2 x 7.7mm type 97 machine guns. The armour varies from 8 to 25mm thick. It has a crew of 4.
Australian support
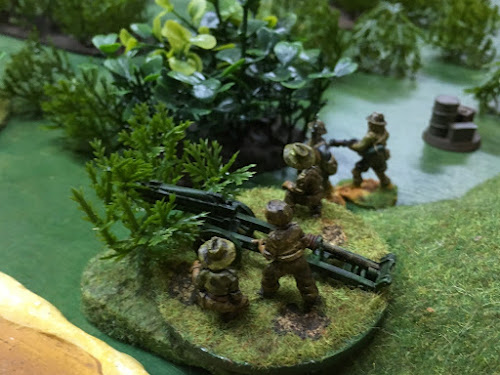
- 2-pdr anti-tank gun with 5 crew and Junior Leader.
- Adjutant to help organise the arrival of the troops.
- 2" mortar team.
FORCE MORALE
Feeling confident after the last game, the Australians rolled well for a Force Morale of 11.
The Japanese start the campaign with a +1 to the die roll. They gained a Force Morale of 9.
PATROL PHASE
Leith chose to use 3 rather than 4 patrol markers. Again the aim of the Australians was to close down the Japanese as quickly as possible. In the campaign the Japanese can move their patrol markers 14" and can be up to 14" apart to represent their preparedness for this campaign. The Australians use the standard 12" patrol distance.
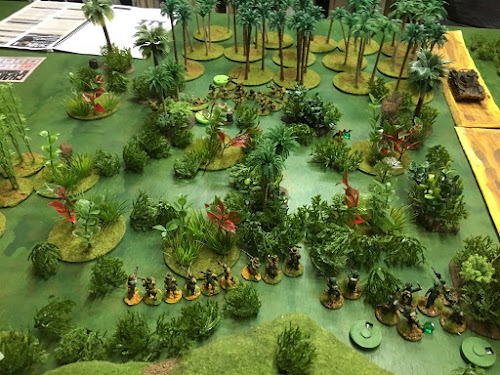
In the photo the white circles show the position of the Japanese jump-off points and the blue the Australian.
BATTLE
Turn 1 Phase 1
- The Japanese force started with initiative due to the campaign, despite starting with a lower Force Morale in this game.
- Rolling 1, 2, 3, 4, 6 the Japanese brought in the medium tank. Leith wanted to bring the tank in early and advance it faster than in the last game, to pressure the Australians.
- Gunsō (sergeant) Haregawa-san arrived and brought in the 1st rifle squad, placing them on overwatch. After a slow deployment due to command rolls in the last battle, Leith was taking no chances this time around.
- Countering, the Australians brought in a 2-pdr anti-tank gun. Early success caused 2 net hits: giving the tank crew 2 shock and killing the driver. This would require 2 activations in subsequent phases for the hull machine gunner to replace the driver.
- Upon arrival the 1st Australian rifle section was effective in dealing 2 kills and 2 shock to the 1st Japanese rifle squad.
- Overwatch fire from the Japanese was not overly effective - only putting 1 shock back onto the Bren team.
Really a stripped down 25-pdr model but being used as a 2-pdr for this scenario
Turn 1 Phase 2
- Japanese command roll of 1, 1, 2, 4, 6. Hasegawa-san removed 2 shock and ordered the 1st rifle squad to open fire, inflicting 1 more shock on the Bren team. Should have been only 1 shock removed as the Gunsō only has 2 command points. Something to remember for next game.
- The tank commander ordered the hull machine gunner to start replacing the driver. He then fired the main gun to put a shock on the anti-tank gun.
- The Japanese 2nd rifle squad was brought in to attack the anti-tank gun. Their fire surprised the crew, wiping out 4 and giving them 1 shock. The Junior Leader somehow survived the onslaught. All this from only 6 hits. Leith understandably was quite pleased with my roll. I was speechless for a few seconds, then we both had a good laugh.
- The Australian command roll was 2, 3, 3, 4, 4. The 2nd rifle section was brought in to protect the one crewman and Junior Leader left operating the anti-tank gun. Their fire was effective; causing 3 shock, 2 kills and the Japanese Junior Leader lightly wounded. No effect on the Japanese Force Morale.
- Sergeant Turner removed 2 shock from the 1st Bren team. Shooting from the 1st section caused 1 shock and lightly wounded Junior Leader Matsuda-san. 2 Japanese leaders now only had 1 command point each. Once again Leith rolled low and with the -1 adjustment, no effect on Japanese Force Morale.
Turn 1 Phase 3
- Japanese 1, 1 ,2 ,6, 6 for command. Combined a 1 and a 2 to activate the tank, completing the change of driver. Ineffective fire against the anti-tank gun.
- Nothing else done, but the Japanese had the next phase due to the double 6.
Turn 1 Phase 4
- Japanese 1, 3, 5, 5, 6. Some Chain of Command points and a mortar team from the grenade discharger squad brought on. We found the organisation of the Japanese grenade discharger squad confusing as it was broken into 3 teams, but each of the rifle squads had no sub-teams. According to Len Tracey the knee mortars always operated together and fired at the same target. So perhaps they should be treated as a single squad with no teams. In the rules they fire as rifle grenades although there is debate on the Chain of Command forum about whether they should be treated as mortars or rifle grenades. Len Tracey also indicated that the large size of the squad was because most of the men were keeping ammo up to the knee mortars. Due to this we allowed the Japanese in this campaign to ignore the rule where rifle grenades run out of ammo if fired in 2 consecutive phases.
- Australian command roll of 1, 1, 2, 3, 5 provided their first Chain of Command point. Anti-tank gun hit the tank but did not penetrate. 2nd section shot, putting 1 kill on the Japanese 2nd rifle squad.
- Acting Corporal Brian Evans ordered his squad to fire on the Japanese 1st rifle squad with good effect; producing 2 kills.
Turn 1 Phase 5
- Japanese rolled 3, 5, 5, 5, 5 which gave them their first Chain of Command die.
- Their 2nd rifle squad fired through the jungle for no effect on the Australian 2nd section. Colin Moore breathed a sigh of relief.
- Japanese used the Chain of Command dice to interrupt so they could fire at the anti-tank gun to try and finish it off. The high explosive (HE) round resulted in a kill on the Bren team, but Colin survived unscathed.
- The anti-tank gun hit the tank again, causing 1 net hit. This resulted in 1 more shock and no activation next phase.
- Concentrated Australian fire was effective, causing 4 shock plus 2 kills on the Japanese 2nd rifle squad.
Turn 1 Phase 6
- The Japanese command roll of 1, 1, 1, 5, 6 allowed them to start their next Chain of Command die.
- Combining the 1s allowed Leith to bring in the 3rd rifle squad to the east of the road, to aid Matsuda-san’s squad. They fired onto the Australian 2nd section and the anti-tank gun, killing the last gunner and leaving only the Junior Leader to serve the gun. A heroic but risky choice had to be made whether to operate the gun with only the Junior Leader and risk more Force Morale loss or move the Junior Leader to safety.
- 1 killed plus Colin Moore wounded. Bad roll for the Australians with -2 Force Morale. Obviously Colin was popular with his men. Or maybe he owed them too much money from two-up: a coin-tossing betting game popular with Australians of that era.
- The Australians hit back with a command of 2, 3, 3, 4, 5. 1 kill plus 1 shock on 3rd Japanese rifle squad. Same result on their 1st rifle squad.
Turn 1 Phase 7
- Japanese command roll of 1, 1, 2, 3, 5. Not bad. More fire laid down, causing 11 hits. Anti-tank gun hit, so must be the Junior Leader. Also 1 hit on Sergeant Gary Turner, who had been directing the 2nd rifle section. No activation for the rest of the turn. Bad Things totalled -2, so Force Morale was down to 7 for the Australians.
- Japanese 2nd rifle squad reduced shock by 2 and shot. 5 shock still on the squad, but the Japanese in this campaign count shock as if they have 2 fewer before determining its effect, so only shot with 1 less die. Due to the heavy cover and difficulty spotting targets in the jungle, there was lots of noise, but no effect from the Japanese shooting.
- The Australians completed a Chain of Command die. Firing with all 3 sections, they inflicted 3 more shock overall across the squads of their foe.
Turn 1 Phase 8
- Japanese command roll of 1, 2, 3, 5, 5 was interrupted by the Australians to shoot at the tank. 1 net hit brought the shock to 3 as well as removing the lowest dice for flat out movement.
- Minor casualties were inflicted by the Japanese, although the grenade discharger squad failed to contribute.
- The anti-tank gun fired again, manned only by the brave Junior Leader. Great rolling gave net 2 hits. Anything but a 6 would cause the crew to bail out. Of course the roll was a 6. The tank main gun was knocked out which was a good thing, but no additional shock. We did not realise until after the game that Leith should have rolled for ‘Bad Things Happen’ when the main gun was knocked out. However, the way he was rolling low for almost all these ‘Bad Things’ rolls it may have meant no effect anyway
- Fire from the Australians caused 1 kill on 3rd squad. Even more accurate was the fire onto 1st squad. 1 kill, 1 shock plus Aoki-san killed. -1 to Force Morale and the squad pinned.
Turn 1 Phase 9
- The Japanese command roll of 1, 2, 4, 5, 6 allowed them to wipe out the Bren gun team of the Australian 2nd section, but with the confused fighting caused by the jungle, there was no impact on the Australian Force Morale. Other fire was ineffective.
- The anti-tank gun hit the tank yet again, but it bounced off the thick mantlet armour.
- The Australian 1st and 3rd sections advanced cautiously, firing as they went. This resulted in 3 more shock to the Japanese 1st squad, bringing them to a total of 8 shock. Worse for the Japanese was the breaking of their 2nd squad, although with the -1 campaign modifier to the ‘Bad Things Happen’ die roll it produced no effect on Force Morale.
Turn 1 Phase 10
- The teams, sections and squads were becoming more fragile on both sides, apart from the Japanese 3rd rifle squad since the Australians had been concentrating on breaking the 2nd rifle squad. Some more trading of fire continued. The main impact this phase was the Australian 1st section wounded Haregawa-san. Knowing their commander was injured, Force Morale for the Japanese dropped to 7.
Turn 1 Phase 11
- The Japanese 3rd rifle squad moved forward towards the Australian jump-off point near the abandoned anti-tank gun. Seeing 18" that phase, they fired across the road onto the flank of the Australian 3rd section – causing 1 kill each on the rifle team and Bren team. Fire from the grenade squad was ineffective.
- As the Australians were about to reply, the Japanese used a Chain of Command dice to interrupt. Their 3rd squad fired on the Australian 2nd section. Unfortunately, the CoC dice was wasted as this shooting had no effect.
- Buoyed by the poor shooting of the Japanese, the Australians replied. 3 shock pinned the Japanese 2nd squad. Matsuda-san was killed. This time the ‘Bad Things Happen’ roll finally gave -2 Force Morale, so the Japanese were now down to 5. 1 more and they would start losing command dice.
- On the left, the Australian 1st section moved forward carefully while firing and inflicted 1 shock on the grenade discharger squad. Getting close enough would force the Japanese squad to use their rifles rather than the knee mortars. With no machine gun in their squad the volume of fire advantage would lie with the Australians.
Turn 1 Phase 12
- Japanese double 6, but nothing else of use. Very frustrating at this critical stage of the battle.
Turn 1 Phase 13
- Japanese 1, 2, 2, 2, 6. Kojima-san removed shock and led the 3rd rifle squad forward. They were now within 4" of the most forward Australian jump-off point, shutting it down. If they moved onto it and ended the turn, then the Australians would have to roll for ‘Bad Things Happen’.
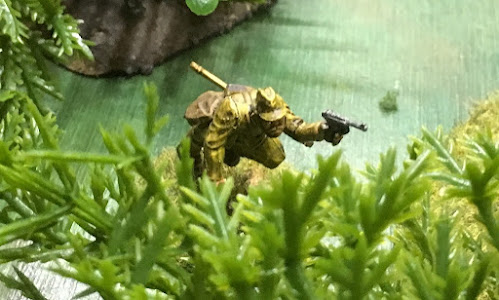
Kojima-san closes in on the Australian jump-off point whilst the Australians temporarily withdraw to the other side of the hill and await reinforcements. The hill is obviously steep since the Australian figures kept falling over. They are meant to be upright
- Close decision, but the Australians decided to withdraw while their force morale was (just) higher than the Japanese.
- The Japanese had command problems due to killed and wounded leaders. The jump off points to the west of the road and the grenade discharger squad were under threat but it would probably take a couple of phases for the Australians to press that advantage. To the east of the road the almost fresh 3rd rifle squad were about to move onto the Australian jump-off point and threaten the damaged rifle team which had withdrawn over the hill in an attempt to reduce further casualties.
- The Australians were thinking about bringing a rifle section across the road to threaten Kojima-san’s flank, but that was a risk as a short move would leave them stranded in the road with a risk of machine gun fire from the wounded tank.
- Australian Force Morale was 1 higher but with the -1 adjustment to 'Bad Things Happen' rolls the Japanese were harder to drop. So from a campaign point of view the Australians decided they had damaged the Japanese enough. It was risky for them to take too many casualties as they rarely get replacements in the campaign.
WRAP-UP
A fun and very close game at the end and a tough decision for the Australians about whether to withdraw or not.
The Japanese rolling for ‘Bad Things Happen’ was impressive for not losing Force Morale on many occasions.
The Australian shooting was more effective overall than the Japanese.
The Australians were very close to knocking out the tank on 2 occasions, including the first round of fire from the anti-tank gun. A good hit in a later phase would have seen the surviving Junior Leader up for a medal.
However, the deadly fire from the tank in only the 2nd phase of the game nearly wiped out the anti-tank gun early.
Care needs to be taken when deploying jump-off points that they are not too far forward as they risk being overrun.
CAMPAIGN IMPACT
The Japanese won the scenario but received 16 casualties plus 2 dead leaders. Next game they would have 2 new squad leaders promoted from the ranks which would only have a command radius of 3" and 1 command point each. If they survived the next game they would become accepted by the men and on a roll of 3 to 6 would become a normal Junior Leader.
With 2 men promoted, casualties and replacements the overall effect would be 5 men down for the Japanese with 4 in hospital who could return to this platoon after the next game.
Fujita-san is now Sociable. CO’s opinion now +1 because of winning but the men’s opinion now -5 due to the high level of casualties. Overall effect is to retain the +1 adjustment to the Force Morale roll at the start of next game.
The Australians received 7 casualties from the main platoon and 5 from the anti-tank gun crew. By having a higher Force Morale and inflicting 50% more casualties (including dead leaders) the campaign impact was not as great for the Australians as it could have been. The result for the Australians becomes a Losing Draw rather than a defeat.
Kenneth Reid is now Popular. CO’s opinion +2 and the men’s opinion +1 due in part to the lower casualties. Overall effect is to give this platoon a +1 adjustment to the Force Morale roll at the start of next game.
For the next game we move on to map 2 which is based on scenario 2 from the rule book.





No comments:
Post a Comment