The fourth battle in the Malaya 1942 campaign fought between Leith and John (that’s me) using Chain of Command. With a major victory to the Australians last game the Japanese would have to try again to break through the Australian line on map 2.
JAPANESE PLATOON 3
In the last battle the Japanese 2nd platoon led by the sociable Rikugun (Lieutenant) Fujita and experienced Gunsō (Sergeant) Haregawa failed to break through the Australian lines. This was due to heavy casualties, particularly amongst the rifle squad NCOs. So, the Japanese commanding officer called in the 3rd platoon in the rolling blitzkrieg towards Singapore.
- The 3rd platoon was led by Rikugun (Lieutenant) Yonai and backed up by Gunsō (Sergeant) Akeda.
- Rifle squad 1 was led by Gocho (Corporal) Miyasawa, a 25-year-old builder from Kyoto.
- Rifle squad 2 was led by Gocho (Corporal) Utsubo, a strong and solidly build 26-year-old from the docks of Yokohama.
- Rifle squad 3 was led by the 24-year-old Gocho (Corporal) Matsuoka. A clever man with a slight build.
- Grenade discharger squad was led by the experienced 31-year-old Gocho (Corporal) Kuramoto.
AUSTRALIAN PLATOON 1
The young but brave Lieutenant Kenneth Reid was leading his men into battle again with the support of ex-stockman Sergeant Gary Turner. The CO’s opinion of Lt. Reid was +3, which gave the Australian platoon +1 support in this battle. The men's opinion was at +1. Reid's outlook was brave which gave him +2 on the Force Morale role.
- Corporal Brian Evans led the 1st section
- Corporal Colin Moore led 2nd section
- Corporal William Colling led the 3rd section.
With no replacements yet, the platoon was 4 men short, with 1 currently recuperating.
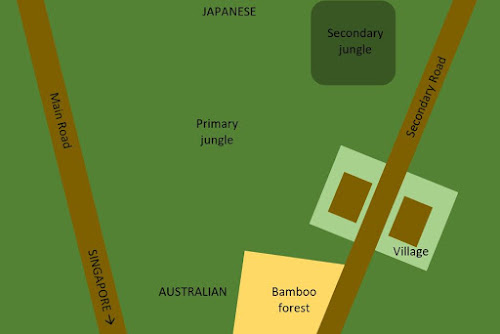
MAP
Like battle 3, this one was to be fought using scenario 2 from the Chain of Command rulebook. Leith had the choice of moving a little east or west of the last map to try outflanking the position. But hoping for a tank as support, he decided to attack in the same location as last time.
However, Leith only brought 2 buildings so the village ended up smaller than last time. We assumed that it had been destroyed in the previous fighting. We were also missing his nice roads.
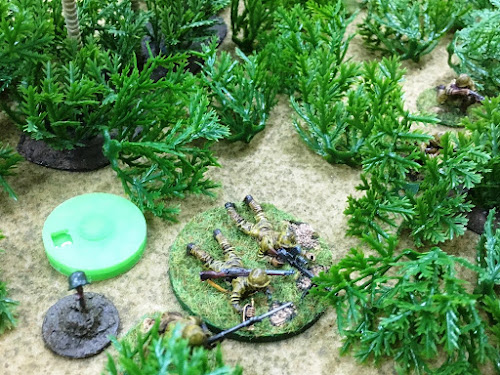
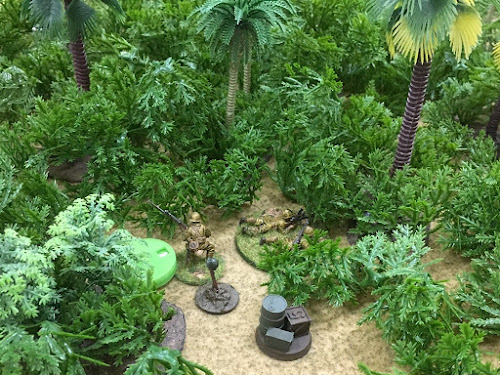
However, I brought all of the scatter terrain this time, not just half of it. So, the jungle appeared thicker than the first two games and much thicker than the last game when I forgot to bring any of it.
This time I tried using my Geo-Hex desert mat as a base rather than the green mat. I thought this would show up clearings better.
 |
| Malaya 1942 Campaign - Map - Turn 4 Battle 4 |
SUPPORT
Leith rolled low, so the Japanese platoon ended up with only 1 support point. This did not allow him anything he thought useful.
The Australians gained 4 support points due to the difference between the two platoons and the extra from the good CO’s opinion. This time instead of the Lanchester (tempting though it was) I decided to bring in an additional infantry section to stop the breakthrough of the Japanese.
FORCE MORALE
With positive adjustments for both sides, the Force Morale was high. Both would begin the game with 11.
PATROL PHASE
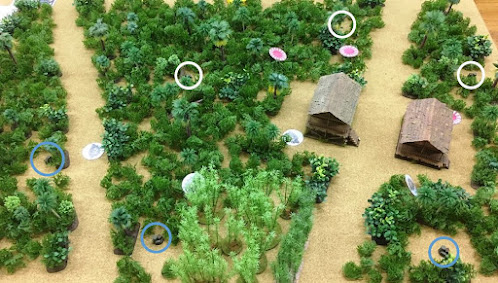
After the problems around the village in the last battle, the Japanese tried a different approach. The Australians rushed to shut down the enemy patrols and even managed to get a jump-off point in a potential flanking position. Both players were being more cautious in placement of the jump-off points. Pushing them forward is tempting, but it can result in them being shutdown and overrun too easily. A fine balance.
In the photo the white circles show the position of the Japanese jump-off points and the blue circles the Australian.
BATTLE
Turn 1 Phase 1
- The new Japanese platoon started with a 1, 2, 3, 4, 6 for command, bringing on Gocho (Corporal) Kuramoto’s grenade discharger squad and Gunsō (Sergeant) Akeda.
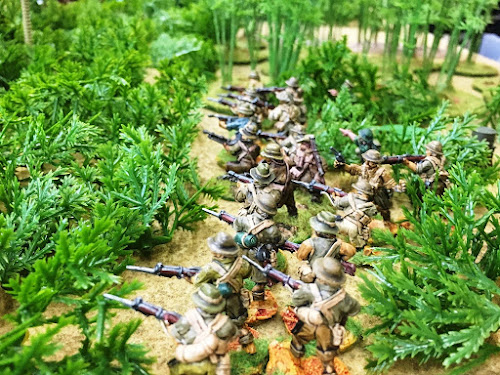
- The Australians started with 1, 1, 3, 4, 6 for command, bringing in Sergeant Gary Turner and the 1st Section near the central jump-off point. They were so busy organising themselves in the jungle, they forgot to set overwatch.
Turn 1 Phase 2
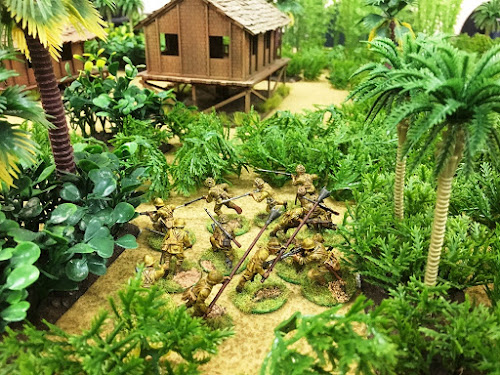
- The Japanese rolled command dice of 2, 3, 4, 5, 5. The Japanese 1st rifle squad arrived, immediately firing on the Australians. They inflicted 2 shock on the rifle team, but none on the Bren.
- The 2nd rifle squad arrived as well.
- Gunsō Akeda ordered the grenade discharger squad to fire indirectly. This produced a further 2 shock on the Australians.
- Not wanting to be outnumbered, the men from down under answered by bringing in the 2nd section and the 4th section. The latter was the temporarily attached support. These men arrived in a position to threaten the flank of the Japanese line.
- Fire from the 3 Australian sections onto the Japanese 1st rifle squad caused 2 kills, 1 shock and the death of Gocho Miyasawa. The early demise of a leader reminded Leith of the unfortunate events of the previous battle.
Turn 1 Phase 3
- A brief downpour began, making the men more uncomfortable and targeting even harder in the steaming jungle.
- Japanese rolled 4, 4, 5, 5, 5. Lots of Chain of Command points. Leith brought on platoon leader Rikugun Fujita. Not ideal to bring him in this early, as it would make it harder to bring in the last squad. However, not doing so would leave the 1st rifle squad at risk since they had lost their commander, particularly as they were currently faced by 3 Australian sections.
- Directing their fire, Fujita-san saw them put 1 kill on the 1st section Bren team.
- Their 2nd rifle squad made great progress through the jungle, moving 12” forward.
- Gunsō Akeda organised the knee mortars to fire on the Australian flanking force, inflicting 1 shock on the Bren team.
- Clearly not wanting to lose the early advantage, the Australian command roll of 1, 2, 3, 6, 6 would allow them to have 2 phases in a row.
- The 3 and 1 were combined to activate a senior leader. Aside from a reduction of 1 shock, there was no other benefit. Despite 15 hits laid down by the Australian 1st and 2nd sections, the Japanese took no shock or kills. After a devastating number of kills early in the last game, Leith remarked that thankfully the Japanese troops had now learnt which side of the trees to be on.
- With the advantage of the double phase (and to try and get some hits) I decided to bring on the Australian 3rd section just east of the secondary road and south of the village. Not only could they target the fast-moving Japanese 2nd rifle squad with fire, but they could act to stop them racing between the bamboo forest and the village. This was in case they tried to get off the board via the secondary road. All Leith had to do to win the scenario was to exit a Japanese squad off the Australian base edge.
- This meant all 4 Australian sections were now on the board. The newly arrived 3rd section at least improved matters by handing out 2 shock to the Japanese 2nd squad.
Turn 1 Phase 4
- A 2, 2, 3, 3, 4 for the 2nd Australian phase allowed activation of all the units on the board. Lots of fire headed the Japanese way and things were looking quite promising with a total of 24 hits from the four sections. Leith again rolled low, resulting in only 1 kill on the 1st rifle squad and 1 shock on the 2nd rifle squad. However, his low rolling converted 2 more kills into hits on Gocho Utsubo. The squad leader was knocked out twice, his solid constitution saving him from a more serious wound. Again, neither roll caused a drop of Force Morale.
- In Chain of Command, when kills are caused you have to roll to see if a leader is hit - if they are nearby. For example, if 2 hits are caused, then a 1 or 2 on a D6 will mean that a leader is hit. If more than one leader is nearby then you randomly determine which is hit. Hitting a leader reduces the number of kills on the enlisted men by 1. A D6 roll on the Leader Wounded table is needed to see if the leader is dead, knocked out until the end of the turn (not phase) or if they are seriously wounded. If they are knocked out they do not lose any command points and become active again when the turn ends. If seriously wounded they lose a command point but are still active unless their command points have been reduced to 0 – in which case they are dead.
- So much shooting from two phases, with so little result apart from the wounded squad leader. But most of the shock had been removed from the Australians.
- As the heavy rain continued, the Japanese 3rd rifle squad was having trouble finding the jump-off point even though their side attained a Chain of Command dice with 1, 2, 4, 4, 5.
- Firing from the 1st and 2nd squads only caused 1 shock on the Australians in the centre, but the grenade discharger squad put 3 shock onto the 4th section who were still just west of the main road.
Turn 1 Phase 5
- With the downpour easing, the Australians improved their fire, despite only rolling 1, 1, 1, 1, 5. Combining the four 1’s allowed the senior leader to encourage fire from the Australian 1st and 2nd sections. 3 shock on the 2nd rifle squad, 1 shock on the 1st rifle squad and a kill on each was better than the last few phases.
- Leith wisely used his Chain of Command die to end the turn so that Gocho Utsubo would regain consciousness.
Turn 2 Phase 1
- Even a good command roll of 2, 3, 4, 4, 5 did not help the Japanese much. The 3rd rifle squad was still trying to find the jump-off point and the grenade discharger squad failed to affect the Australian 4th section this phase.
- Only a slightly better was to be had in the centre, where a shock was placed on each Bren team and a rifleman killed in the Australian 2nd section.
- The Australian return fire using 1, 3, 4, 5, 5 was more effective. 2 kills and 1 shock on each of the 1st and 2nd rifle squads in the centre.
- Worse was the wounding of platoon leader Rikugun Yonai who sustained a serious wound (dropping him from 3 to 2 command points).
Turn 2 Phase 2
- With a 1, 1, 3, 4, 4 the Japanese killed a Bren gun loader and a rifleman in the central sector.
- Again the 3rd rifle squad failed to arrive. Leith was really missing their help.
- Feeling they were gaining the upper hand, the Australians again rolled a double 6. Just a shock to each of the central sector rifle squads. But poor Gocho Utsubo was again knocked out. So much for his temporary recovery by ending the turn. Once again, his men had faith in his strong constitution. Or perhaps some were not aware that he had temporarily woken up. Either way, his relapse into the arms of Morpheus did not affect their morale.
- The bravery of the Japanese leaders in this campaign could not be questioned, but their propensity for being wounded was seriously hampering the rapid push on Singapore.
Turn 2 Phase 3
- The Australian phase again. And with 2, 2, 3, 3, 3 they could remove most of the shock, something they had been very successful with throughout the battle.
- A rifleman killed in the Japanese 2nd squad was only an indication of what was to come.
- Heavy fire from the Australians inflicted 2 kills and 3 shock on the dwindling 1st squad. With a total of 6 shock and only 5 men left, they were pinned. Not a good position to be in as they were at risk of being surrounded or wiped out by the Australians.
- The command roll was again quite reasonable for the Japanese. But the reserve squad still failed to arrive and the fire from the ever-decreasing number of deployed men amounted to nothing.
Turn 2 Phase 4
- The supporting 4th section began advancing carefully across the road towards the dwindling flank of the Japanese firing line. Although their reduced fire had no effect, they were moving into position for an assault next phase on the pinned squad.
- A command of 3, 3, 4, 4, 5 allowed the Australians to do everything they wanted, including removing the last of the shock.
- The Japanese 2nd rifle squad received 1 shock and 1 kill.
- Incoming fire on Gocho Miyasawa’s pinned squad was too much for them. 1 kill and 2 shock was enough to break them. They retreated 12” north into the jungle in an effort to escape the withering Australian fire.
- This time the men of the platoon were concerned; dropping their force morale by 2 to 7.
- With several wounded and dead leaders, a broken squad, another badly damaged, the grenade discharger squad not achieving significant impact and a squad lost somewhere in the jungle there was no chance of success for the Japanese. They again withdrew from this unlucky field in the hope of successfully performing the ritual of “tanks going forth” for the next battle.
WRAP UP
Like the previous battle, the failure of the Japanese to obtain supports was important as it allowed the Australians to have more shooting power overall. Without the risk of a tank racing down the road and breaking through the lines, the Australians called on a 4th section of men, rather than an anti-tank gun.
The other major factor was the untimely demise of Gocho Miyasawa in only the second phase. This forced Leith to bring in his most senior leader early. He was worried this might make it more difficult to bring on his reserve, although neither of us expected it to be impossible. But we had not counted on the non-arrival of the navigationally challenged 3rd rifle squad.
Leith was good at avoiding casualties to the men early in the game, but not to his leaders. The last two battles have shown just how important leaders are. The early loss of some command points has a cumulative effect throughout the game.
After the battle we discussed what might have happened had the Japanese launched a banzai charge towards the end. Not with the hope of winning this battle, but with the aim of inflicting as many casualties on the Australian platoon. The Australian player has to carry this platoon through the campaign, so needs to watch casualties.
Leith felt that this was non-historical and too gamey. At this early stage of the war the Japanese were using good small unit tactics. Yes, they would press the attack hard. But after a few attempts, they would try and outflank a position that was too hard to break through head-on.
And it may not help anyway. In the campaign the winner retains the field. They reduce “kills” by any positive difference in force morale. A last-ditch attack may inflict some casualties but it risks a collapse of force morale. Which may well just lead to getting all those casualties back anyway.
Perhaps if the Japanese can gather early and assault in force this may give them the desired result. Although if they win the battle they have to carry their platoon forward. An interesting dilemma, although they can receive replacements every time they win.
CAMPAIGN IMPACT
A third victory to the Australians. More delays to the Japanese thrust toward Singapore.
With a positive force morale difference of 4, this meant that the 4 Australians “killed” in this battle were bandaged, given a good hot cup of billy tea and returned to action. So, no casualties and 1 returning from hospital for the Australians; leaving the platoon only 3 men short. They could even return the borrowed 4th section intact to their original owners.
The CO’s opinion of Lt. Kenneth Reid increased to +4, which retains +1 support point next game.
The men's opinion finally increased, going up two to become +3. Obviously hard to impress this lot of Australians, but now this would give a +1 modifier to the Force Morale roll.
However, although Lieutenant Reid’s outlook improved from brave to superior it drops his outlook adjustment from +2 to a +1. If the platoon leader’s outlook becomes too high on the Outlook Table in the “At the Sharp End” campaign supplement, the leader becomes more aloof and arrogant in the eyes of the men. A fine balance.
So overall from these two adjustments, the Australians will retain a +2 Force Morale modifier.
With several dead and wounded leaders, plus lots of casualties, the Japanese will again bring in a fresh platoon for the next battle. In the meantime, the ritual of “tanks going forth” is being performed with great care.



No comments:
Post a Comment