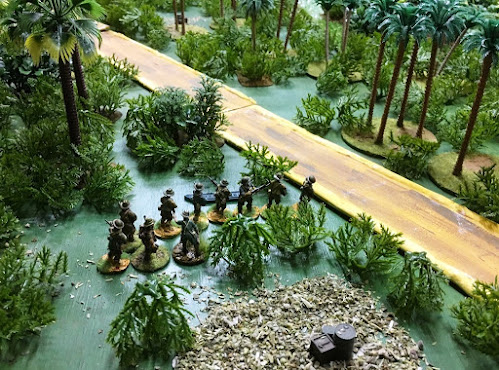
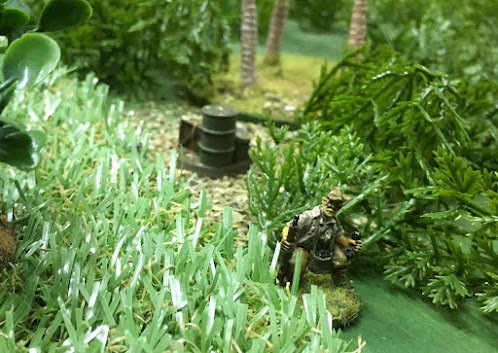
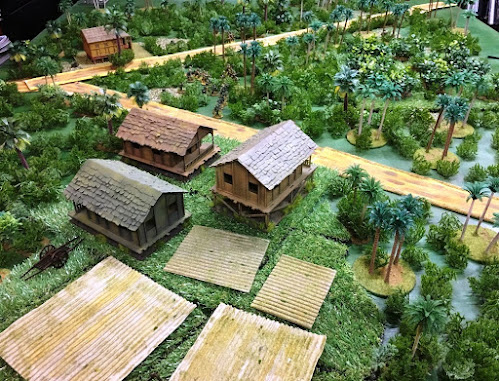
Day 2 in the battle of Yong Peng, otherwise known to the Australian troops as the defence of Latipah’s Tea House. The Australians have fought the Japanese to a temporary standstill and are trying to push them back from shelling range of the critical Y-junction near the town of Yong Peng, just north of the island of Singapore. The Australians will be counter-attacking for the first time in the campaign.
This was the seventh battle in the engrossing Malaya 1942 campaign using Chain of Command. Fought between Leith and John using the pint-sized campaign written by Len Tracey for this great system.
 |
| Last minute cup of tea before starting the battle. The Lanchester armoured car was sent to the rear with messages for high command in case the Japanese had tanks. It was not a support for this battle |
JAPANESE 5th PLATOON
The Japanese commander was cycling through his platoons to try to break through the Australians and take Singapore. He had not been able to cause enough casualties so far in the campaign and was using the 5th platoon in the second day of this battle to replace the routed troops of the no longer secure Rikugun Yamada.
- Leading the 5th platoon was the 26-year-old Rikugun Sakurai, a cheerful professional who had been in the army for many years and felt he could do much better than Yamada.
- Aided by Gunsō Tashiro, a 24-year-old farm labourer from southern Honshu.
- Rifle squad 1 was led by 22-year-old Gocho Watabe.
- Rifle squad 2 was led by Gocho Sawada, a 23-year-old stable hand.
- Rifle squad 3 was led by the hard drinking Gocho Haneda. He had reached the grand old age of 33 and his men called him sofu (my grandfather).
- The grenade discharger squad was led by the 24-year-old Gocho Rikiishi.
AUSTRALIAN 1st PLATOON
Lieutenant Kenneth Reid’s platoon had delayed the Japanese vanguard. They had temporarily halted the Japanese in a few of the battles and now looked to push them back further from Singapore with a limited counter-attack.
The CO’s opinion of Lt. Reid was +5. He was feeling Heroic. The men's opinion was good at +4.
Sergeant Gary Turner again backed him up.
- Corporal Brian Evans returned from concussion to lead the 1st section. Acting Corporal “Billy” Brewer, who had stood in for him, returned amongst the men.
- Corporal Colin Moore still led the 2nd section
- Corporal William Colling continued to lead the 3rd section.
MAP
This was the second day of the battle on map 3, using scenario 3 from the Chain of Command rulebook. This time the Australians were counter-attacking, a new experience for them.
 |
| Malaya 1942 Campaign - Map 7 near Yong Peng |
SUPPORT
As the attacker, I rolled a 6 for support. With +3 force difference between platoons and +1 from the CO’s opinion, that gave me 10 support points for the Australians.
Leith got 3 support points from half the roll, not a lot to help his defence.
Given that no medium tanks were possible for the Japanese, I decided against a 2-pdr anti-tank gun. A light tank was unlikely given its poor showing in the previous battle, but just in case I chose a backup Boys anti-tank rifle squad. As the main support I chose 2 infantry sections to aid the counter-attack and hopefully pile the shots onto the Japanese squads.
Leith chose an MMG team with 5 men and a junior leader.
Of course, we kept these choices hidden from each other.
FORCE MORALE
The Japanese had a +1 adjustment to the die roll due to the campaign. The Australians had a +2 due to campaign opinions. The result was the Australians starting with 10 and the Japanese with 9.
PATROL PHASE
The Japanese commander initially deployed his patrol markers from the secondary jungle across to the secondary road just north of the village. Being Scenario 3 Attack & Defend from the Chain of Command rules, the Australians rolled and had 2 free moves from the baseline before the normal Patrol Phase commenced. The photo shows after the two free moves. Ignore the position of the jump-off points as these were the positions from the previous game.
 |
| Starting position for the Patrol Markers after the free moves. The jump-off points have not yet been moved from the previous day's battle |
The Japanese commander locked down the Australian patrols quickly to stop them outflanking on his right.
Leith did not want to put his jump-off points too far forward. In the unlikely event that the Australians would cross the relatively open ground around the Yong Peng outskirts, he could cover that from his eastern jump-off point. His central one was safeguarded by the secondary jungle and would allow him to deploy just forward of it in the primary jungle.
The white circles show the position of the Japanese jump-off points and the blue circles the Australian.
 |
| Patrol phase finished showing the new jump-off points |
BATTLE
With the higher Force Morale, the Australians began the counter-attack from the Y-junction. As per the “At the Sharp End” campaign supplement the Japanese chose to begin this scenario with a Chain of Command die and an emplacement. As per the Australians in the last battle, it made no sense to start with 3 emplacements in an area that was mostly hard cover. Starting with a Chain of Command die was a good option.
Turn 1 Phase 1
- An interesting start. A command roll of 3, 5, 6, 6, 6 meant the turn was over at the end of this phase and the Australians would also get the next. They brought in their 4th rifle section (one of the supports allocated to them for this battle). Since the turn was ending there was no point in putting them on overwatch.
Turn 2 Phase 1
- The Australians continued their deployment with a handy 1, 2, 3, 4, 4. Their 2nd section came in on the left of the 4th section, going on overwatch as they deployed. Sergeant Gary Turner arrived to direct the established 4th section to move forward, but only 3” tactically so as to not lose touch with their newly arrived comrades.
 |
| Australian 2nd and 4th sections deployed in the centre |
- The Australian 1st section assembled just north of Latipah’s tea house, also going on overwatch.
 |
| The experienced Australian 1st section covers left of the main road |
- The Japanese replied with a 3, 4, 4, 5, 6 which only allowed them to bring in a supporting medium machine gun (MMG) team near the south-east corner of the secondary jungle area. Immediately they opened fire on the Australian 4th section, but they must have been still settling into position as their sole hit had no effect.
- Overwatch fire from the Bren team and 2 riflemen from the 2nd section was on target. 2 kills and 2 shock on the MMG showed the Japanese how it should be done.
 |
| Japanese MMG provides support |
Turn 2 Phase 2
- Command of 2, 3, 3, 4, 5 gave the Australians plenty of options.
- As the 4th section prepared to shoot, the Japanese interrupted using their Chain of Command die. The MMG fire killed one of the Bren team while adding a shock to the rifle team of the 4th section.
- With a shock removed, the return fire from the 4th section killed another machine gun loader as they protected the careful 5” advance of the 2nd section.
- The Australian 5th section arrived to support the other two Australian sections in the centre.
- 1, 2, 4, 5, 6 was less than the Japanese hoped for. They brought in their 1st rifle squad, in front of the secondary jungle, to supplement the fire from the MMG and spread the return fire of the Australians. Their first fire killed a rifleman from the newly arrived Australian 5th section.
 |
| Battle lines are forming with the Australians on the left and Japanese on the right |
- Gunsō Tashiro arrived to remove a shock from the MMG. His appearance inspired the crew to give 9 hits out of 10 dice on the Australian 2nd section, killing a rifleman.
 |
| Gunsō Tashiro arrives to try and stabilise the situation |
Turn 2 Phase 3
- The Japanese were put further on the back foot with the Australian command roll of 1, 2, 4, 6, 6. Another double phase to the Australians.
- Sergeant Turner transferred a rifleman to the dwindling Bren team before ordering the 4th and 2nd sections to open fire. This was solid work, resulting in 2 shock and 1 kill on the Japanese 1st rifle squad, plus the junior leader of the MMG team knocked out. The team was down to 2 active men with 2 shock. No effect on the Japanese Force Morale, though.
 |
| View of the battlefield from the Yong Peng water tower |
- To bring more guns to bear in the centre, the Australian 5th section moved 8” forward. Now three Australian sections had the Japanese 1st rifle squad in their sights.
Turn 2 Phase 4
- The Japanese situation went from bad to worse with an Australian command roll of 2, 6, 6, 6, 6. Not only would the Australians get this phase and the next, but they got a full Chain of Command die as well as a roll on the random events table.
- Could things get any worse for the Japanese? Unfortunately, they did. A barrage from off-table mortars arrived to support the counter-attack. These landed directly on the only deployed Japanese troops, stopping their movement and plastering them with HE for two phases. Their 1st rifle squad lost 2 killed and took 1 shock, while the MMG ended pinned after losing another man killed and taking 3 shock.
- The event rolled was a random mortar barrage, which could just as easily have landed on top of the Australians or missed both sides altogether. Since it came in on top of the Japanese it made sense that it was a barrage supporting the counter-attack._
- Small arms fire added 1 kill and 1 more shock to the Japanese 1st rifle squad.
Turn 3 Phase 1
- This was the sixth phase to the Australians. The Japanese had only managed two so far.
- A 1, 3, 3, 4, 4 allowed the Australians to do everything they wanted.
- First, the barrage. 1 shock to the MMG was enough to break them. They hunkered into the jungle floor as best they could to find extra cover. They could not run because of being pinned by the barrage. A loss of 2 force morale brought the Japanese to 7.
- The barrage continued its work before lifting by adding 4 shock to the Japanese 1st rifle squad Worse was the wound to their squad leader, which left him with only 1 command point and a further drop in the Japanese force morale.
- Supporting rifle fire from the 4th section killed 2 riflemen from the 1st squad which left the latter with 7 men and 8 shock (counting as 6 shock for the Japanese). Nearly pinned.
- They also wiped out the remaining men on the MMG, causing a further drop by 2 of the Japanese force morale. Now at 4, they would only roll 4 command dice.
- Things balanced a little with the Australian 2nd and 5th sections failing to land a further blow.
- The Australian 1st section dashed across the road to threaten the right flank of the already discomforted Japanese 1st rifle squad. Most of the men made it across, but a few stragglers were still crossing the road.
 |
| The Australian 1st section crosses the road, heading for the right flank of the Japanese 1st rifle squad |
- The 2” mortar arrived behind the Tea House to fire at the enemy rifle squad, with the faint hope of pinning them, but were off target.
- Finally, a Japanese phase. Lieutenant Kenneth Reid debated whether to interrupt with his Chain of Command die to try to pin the Japanese rifle squad or save it to end the turn after reaching the jump-off points. But the shell-shocked Rikugun Sakurai decided to withdraw before the advancing Australians swamped his rifle squad and his jump-off points. He had had enough.
- With only 4 command dice, his only on-table rifle squad about to get pinned then assaulted, a wounded squad leader, his support gone and the jump-off points beginning to look too close to the Australians, there was not much hope for the Japanese.
 |
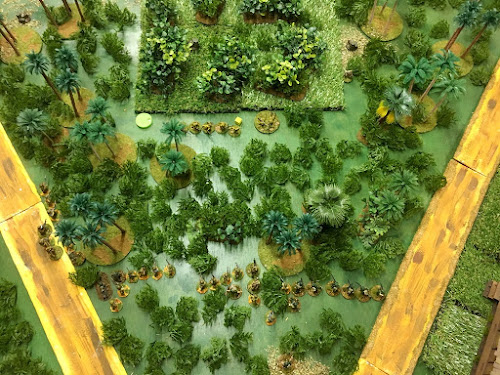
| Aerial view of the troops just prior to the Japanese withdrawal |
WRAP UP
The Australians pursued the Japanese hard to force them back up the road a few miles, then dug in to await the expected counter-attack. Meanwhile, the reserve units combed the battlefield. They collected their wounded and sent them back to Latipah’s Tea House for a strong cuppa.
The Australians were surprised at the ease with which they had sent the Japanese packing. So were the Japanese.
With only 2 phases for the Japanese versus 7 to the Australians they did not stand much chance. But with their large squads, the Japanese could probably still put up a good fight if it were not for the barrage. The Japanese were unlucky in that an Australian quadruple 6, followed by a double 6 followed by a random barrage, which happened to land on the Japanese, was about a 1 in 70,000 chance.
If the barrage had landed on the Australians instead, then the latter would probably have taken enough casualties to force them to withdraw from the field, due to the requirement in the campaign for the Australians to use the same platoon.
 |
| The wounded were sent back to Latipah's Tea House and a reserve platoon assembled as Lt. Reid's platoon pursue the Japanese north |
CAMPAIGN IMPACT
A major victory to the Australians. The Japanese had been pushed back to map 2. Although regaining the initiative, they have no way to win the campaign as they cannot reach map 6, let alone win a battle there, by turn 10. What they seek now is revenge on the platoon that has caused them so much trouble.
Due to the force morale difference, the Australians were able to recover all 5 men that had been put out of action (“killed”) in the battle. Losing none this battle and with 1 returning for the next battle meant that the Australian platoon was now only 1 man short. Rather unexpected.
Unsurprisingly, the CO’s opinion of Lt. Kenneth Reid rose to +6, as did the men’s opinion. Unfortunately, Lt. Reid’s own outlook became arrogant. Such responsibility and success had taken its toll on the very young Australian leader.
The Australian press were ecstatic. However, due to reverses to the east and west of this successful Australian platoon, the counter-attack had to stop after a few miles. It could not be continued without risking their flanks. The Australians would have to revert to the defensive for the next battle.
The Japanese supplies were beginning to dwindle. Lt. Reid’s platoon was buying valuable time for the improvement of the defences at Singapore. But would Percival make good use of this extra time on the island colony?
Great AAR. The Japanese were on the back foot right from the start and things never looked up. A good victory for the Diggers!
ReplyDeleteThe following time I read a blog, I hope that it doesnt disappoint me as much as this one. I imply, I do know it was my choice to learn, but I actually thought youd have one thing interesting to say. All I hear is a bunch of whining about one thing that you possibly can repair in the event you werent too busy searching for attention. online casinos
ReplyDelete