Sunday, 29 April 2018

MALAYA 1942 CAMPAIGN - TURN 3


The third battle in the Malaya 1942 campaign fought between Leith and John (that's me) using Chain of Command. With a major victory to the Australians in the first game and a minor victory to the Japanese in the second game the Australians had been pushed back closer to Singapore. The third battle was to be fought on campaign map 2.

Chain of Command Malaya Campaign Turn 3

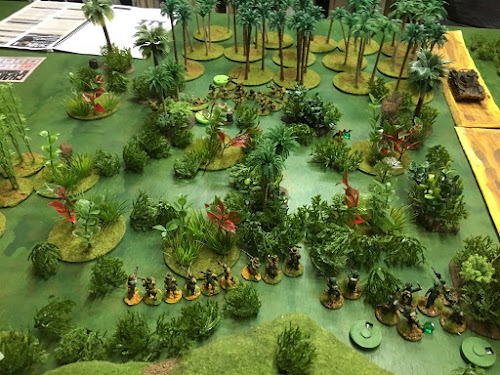
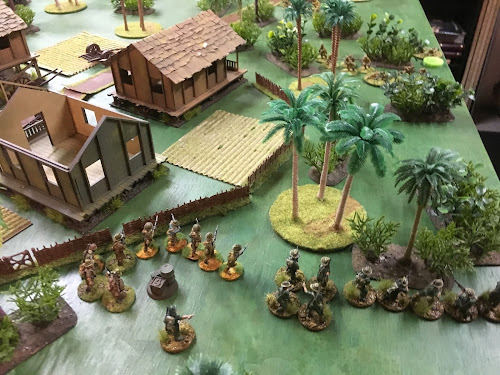
I had brought all my based jungle trees and bushes to add to Leith's. Unfortunately I forgot to bring the loose scatter bushes to add in between the trees. So the table looks sparser than previously. Note that it is still mostly primary jungle except for the roads, village, bamboo forest section and secondary jungle section. Due to the missing scatter bushes we used fences to define the edges of the cleared village terrain, but these would not affect movement nor provide additional cover.


JAPANESE PLATOON 2

The Japanese 2nd platoon led by the sociable Rikugun (Lt.) Fujita and Gunsō (Sergeant) Haregawa carried forward from their victory in the last battle. However, rifle squad 1 leader Aoki-san and rifle squad 2 leader Matsuda-san were out of the campaign and had to be replaced.

With casualties, the 2 promotions and some replacements, this left the Japanese platoon a total of 5 men short. 4 other men were absent recovering from the last battle and would return for the next turn.

The CO’s opinion of Fujita-san is +1 due to the victory. His men’s opinion is -5 due to the large casualties in gaining the victory. Including the +1 for the campaign, this results in an overall +1 on the Force Morale roll for Japanese in the third battle.

Rifle squad 1 was now to be led by Amatatuda-san, a 23-year-old loyal supporter of the Emperor.

Rifle squad 2 was now to be led by Yatamura-san, a 27-year-old weaver from northern Hokkaido.

These promoted men would have only 1 command point and a 3” command range, giving reduced command to the Japanese for this battle. If they survived the battle, Leith would roll a D6 and on a 3 to 6 they would learn from their experience, be accepted by their men and become a normal Junior Leader with 2 command points.


AUSTRALIAN PLATOON 1
The popular Lieutenant Kenneth Reid gained a +1 force morale. His CO’s opinion was +2 and his men’s opinion of him was +2.

The Australian platoon was 3 men short from casualties in the first two battles. They also have 2 men in hospital who will return for turn 4.


MAP

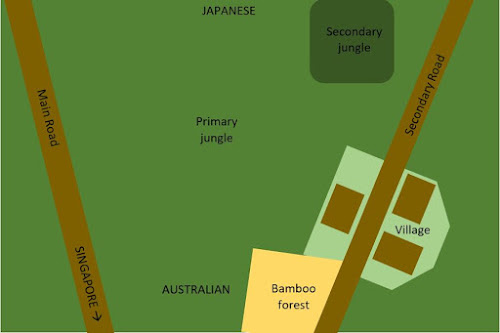
The battle was to be fought using scenario 2 from the Chain of Command rulebook. The Japanese have passed the defile and can now attack the Australians using the main road or a secondary road.
Rolling 3 times on the campaign terrain table gave us a village, a bamboo forest and some secondary jungle as shown on the map. North is approximately to the top of the map.

Chain of Command Malaya Campaign Turn 3
Malaya 1942 Campaign - Map - Turn 3 Battle 3


SUPPORT

Leith rolled low, so the Japanese platoon ended up with only 1 support point. This did not allow him anything useful.

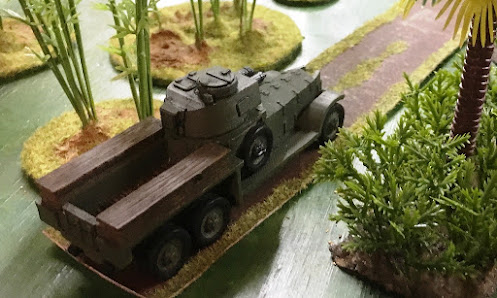
The Australians gained 3 support points due to the difference between the two platoons. There were no adjustments. I decided to bring in a Lanchester armoured car. I felt safe with this as Leith could not afford any tanks (phew). It has a 0.50 cal and two 0.30 cal machine guns. Which is pretty handy.

But the main reason was that I had recently modified a Rolls Royce design and 3D printed an approximation to a Lanchester.
See https://www.thingiverse.com/thing:769137 for the Rolls Royce armoured car (and lots of other AFVs by m_bergman on Thingiverse.

When first looking through the campaign a couple of weeks ago I had notice the Lanchester mentioned. I had never heard of this before and looked it up. Not too different from a Rolls Royce armoured car, which I knew a little about. Lanchesters were pretty well outdated in Europe by the 1930s so they were sent to the far reaches of the British Empire.

I found a 3D print version of a Rolls Royce armoured car and quickly modified it to approximate the Lanchester with its twin rear axles, different turret and different machine guns. You will notice some differences. Mainly the rear tray looks too long and the mudguard is not rounded at the front. It was going to take too much 3D drawing effort to do an exact model by extending the cabin rearwards and moving the turret rearwards, but it gives a good impression of the Lanchester. A couple of 3D prints later and both Leith and I had a pair of “pseudo” Lanchesters that we were happy with. The photo below shows my 2 Lanchesters with the painting partly complete.

Chain of Command Malaya Campaign Turn 3


FORCE MORALE

Obviously pleased after their victory, the Japanese ended up with 11 for Force Morale. The Australians only ended up with 9, which would make them a little more fragile than their enemy. Especially when you consider the -1 to the “Bad Things Happen” dice rolls that the Japanese get in this campaign to reflect their confidence.


PATROL PHASE

In this scenario the Australians start their 4 patrol markers 12” from the baseline and can be spread out. You have to be careful not to start them too far apart as this restricts where you can move to initially. The Japanese started with their 4 patrol markers in a pile at some point on their baseline after the Australians had placed theirs.

In the campaign the Japanese can move their patrol markers 14” and be 14” apart to represent their preparedness for this campaign. The Australians use the standard 12” patrol distance.

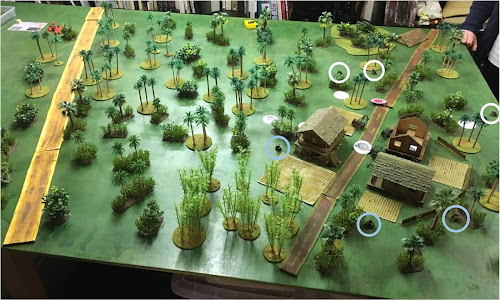
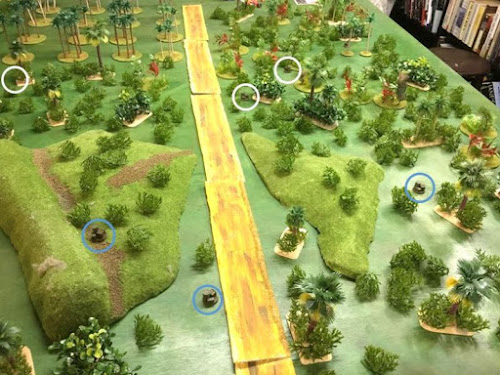
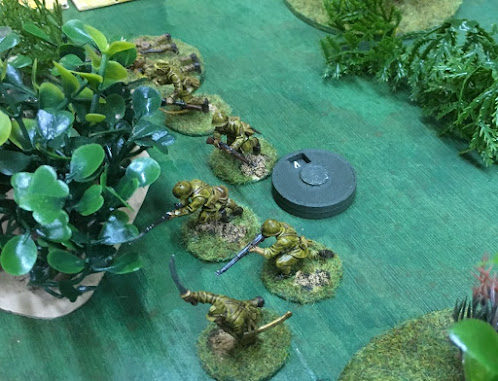
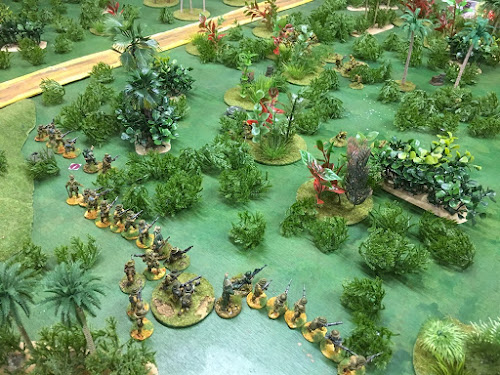
The Japanese concentrated on pushing down the eastern side but were stopped just in time by the Australians. We learnt that sometimes it is a mistake to place a patrol marker closer than 6” to a side edge as this may preclude the placing of a jump off point. We were not sure if you could bend the 6” along the side edge towards the player’s baseline, so decided not to allow it. One to check on the forum. In the photo the white circles show the position of the Japanese jump-off points and the blue the Australian.

Chain of Command Malaya Campaign Turn 3


BATTLE

Turn 1 Phase 1
  • The Japanese force starts with the initiative in most battles in this campaign. They began with a roll of 1, 1, 2, 4, 6 for command.
  • Gunsō (sergeant) Haregawa arrived and brought in the 1st rifle squad.
  • Replying with a 1, 4, 4, 5, 6 the Australians did nothing as it would be too dangerous to just bring in a Senior Leader. It would just make him a target.

Turn 1 Phase 2
  • Japanese roll command of 2, 3, 5, 6, 6. The next phase will be theirs as well. Hasegawa-san moved the 1st rifle squad forward 7”.
  • The knee mortar squad was deployed on the road.
Chain of Command Malaya Campaign Turn 3


Turn 1 Phase 3
  • Japanese roll 1, 1, 2, 2, 5. Leith brought on the 3rd rifle squad.
  • The 1st rifle squad continued to move forward, threatening the closest Australian jump-off point. Due to activating with a 2 and not a 3, they could not go onto overwatch.
  • With a 2, 3, 3, 5, 5 the Australian 1st section arrived to protect the jump-off point. Their defensive fire was fierce, causing 3 kills and 3 shock on the undermanned Japanese 1st rifle squad.
  • With the Australian 2nd section arriving a short time later, the Japanese must have moved to the far side of the trees as they only dealt them 1 shock.
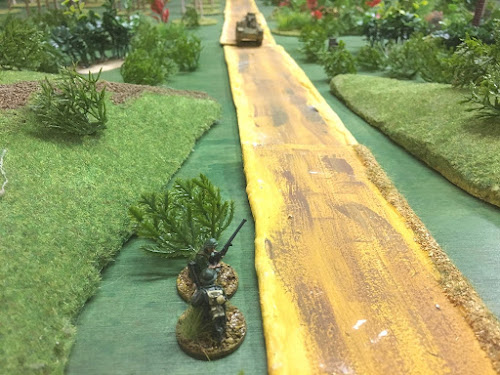
  • The arrival of the Lanchester armoured car on the secondary road surprised the Japanese mortar squad. They were a tempting target on the road. But despite being caught in the middle of the road, there were no kills. At least the mortar team gained 2 shock.
Chain of Command Malaya Campaign Turn 3


Turn 1 Phase 4
  • A Japanese command roll of 1, 2 ,3 ,5, 5. Chain of Command points were being amassed by both sides, although it meant less troops movements in these early stages of the battle. • The combined fire of the Japanese 1st rifle squad and the mortar squad killed a rifleman and a Bren gunner across Australian sections 1 and 2.
  • With a 2, 3, 3, 6, 6 the Australians would have the next phase as well. This allows a player the opportunity to perform more complex manoeuvres, knowing that you won’t be shot at until after the 2nd phase unless the opponent uses a Chain of Command die to interrupt with one unit. It is also a good opportunity to try moving a long way. Of course, if you don’t activate the unit again in the second phase, it could end up stuck in a precarious position. It can also be used to pour two lots of fire into a unit, with no recovery between unless a Chain of Command die is used.
  • Fire poured into the Japanese 1st rifle squad 1 from the 1st and 2nd Australian sections. It was devastating, with Amatatuda-san and 7 others killed plus some shock. With the death of their leader and the squad a shadow of its original, they broke and ran north. Overall the Japanese force morale dropped by 3, despite the -1 adjustment for each roll.
  • The Lanchester added to their woes. This time the fire from the HMG and the MMG were more accurate, inflicting 5 kills and 2 shock on the stranded mortar team. Their leader Onishi-san was knocked out, causing the force morale to drop another point.
  • Australian force morale was still 9, but the Japanese had dropped from a starting value of 11 down to 7 in this turn.
Chain of Command Malaya Campaign Turn 3


Turn 1 Phase 5
  • Next phase to the Australians with a 1, 1, 2, 4, 5 bringing Chain of Command points to 4 – not a full dice but well on the way.
  • Young Lt. Reid removed some shock, ordered the 2nd section to carefully move forward whilst the 1st section covered their advance. Their fire caused 1 kill on the Japanese 3rd rifle squad.
  • More fire from the Lanchester brought 2 more casualties and another hit on Onishi-san. This was the 3rd time he was knocked out and again there was no loss of Force Morale for the Japanese. He was lucky that he had not been killed.
  • At last the Japanese were able to move the mortar squad off the road and into the heavy cover of the jungle with a roll of 1, 2, 2, 5, 6. They also wounded Corporal Colin Moore who was directing the 2nd section Bren team, reducing the Australian force morale to 8.
Chain of Command Malaya Campaign Turn 3


Turn 1 Phase 6
  • Lots more Chain of Command points for the Australians, but limited and ineffective fire with a command or 1, 1, 5, 5, 5.
  • Leith and I had a discussion bout visibility in the primary jungle. The campaign rules suggest 12” plus 1D6” every time visibility distance needs to be checked. This is quite reasonable and has given a good effect so far. What we discussed was when do you check the roll. We decided that you have to activate a team/section/squad first, then roll for visibility. Once you know the visibility you can then decide what you want that team or section/squad to do.
  • A good command roll for the Japanese this phase. A 2, 3, 4, 5, 6 allowed the 2nd rifle squad to arrive and fire against the Australians spreading 3 kills and 1 shock against the 1st and 2nd sections.
Chain of Command Malaya Campaign Turn 3


Turn 1 Phase 7
  • The Australian command roll of 1, 3, 4, 5, 5 was interrupted by the Japanese using their Chain of Command die. The result was a satisfying 3 kills and 2 shock across the Australian 1st and 2nd sections.
  • Again the Australian leaders were able to reduce shock on their teams.
  • The 2nd section returned fire, killing a rifleman and wounding Kojima-san without impact to Japanese force morale.
  • Only a shock on the 3rd squad from the reduced fire as Corporal Brian Evans carefully moved his section forward.
  • The Lanchester began driving up the road. Bumping and rattling along the rough secondary road reduced the accuracy of its machine guns against the mortar squad now in cover in the jungle.
  • Responding with 1, 2, 2, 4, 6 only allowed the Japanese to reduce one shock and inflict one on the Australians. With one leader killed, another knocked out and a third losing a command point, the reduced Japanese leadership was limiting their ability to fight effectively.

Turn 1 Phase 8
  • With a 1, 1, 3, 4, 5 for command the Australian men concentrated fire on the enemy 3rd squad. Inflicting 3 kills and 2 shock was bad enough, but Kojima-san was hit again, putting him out of action and dropping the Japanese Force Morale to 6. With only 6 men left and 4 shock the squad was close to being pinned, particularly given the further reduced leadership.
  • Further fire rattled out from the Lanchester, inflicting 1 kill and 2 shock.
  • The Australians brought on a fresh section to safeguard the jump off point just west of the village.
Chain of Command Malaya Campaign Turn 3

  • This was too much for the Japanese. With 24 men out of action, shock piling up, 2 leaders killed and Onishi-san still knocked out, the Japanese withdrew. A good round from the Australians would put their force close to breaking. The Australians now had more men, more command points, a fresh section, minimal shock and the mighty Lanchester.
  • Australian Force Morale was 8 to 6 for the Japanese1 higher but with the -1 adjustment the Japanese were harder to drop. So from a campaign point of view the Australians decided they had damaged the Japanese enough. It was risky for them to take too many casualties as they rarely get replacements in the campaign.


WRAP UP

Early casualties to the Japanese riflemen did not help their cause. With less men to shoot back the squad quickly diminished further in size.

Worse was the reduction in Japanese leadership that continued throughout the battle. This made it difficult for the Japanese to activate some units at times. It always made it difficult for them to reduce shock.

Surprising the mortar team in the road and having two consecutive phases of fire against them, before they could dash into the jungle, quickly made them ineffective. Leith had been hoping to race them down the road and off the board to achieve the mission, whilst most of the Australians were fighting in the jungle to the east and west of the road. The appearance of the Lanchester was a great surprise to the Japanese.

Chain of Command Malaya Campaign Turn 3


CAMPAIGN IMPACT

A second victory to the Australians, causing further delay to the Japanese advance.
With a positive force morale difference of 2, this meant that the 6 Australians “killed” in this battle dropped to 4. This represents the Australians finding and recovering casualties because they were left in control of the field.

This translated to 2 dead, 1 out for the next battle while recovering and 1 returning immediately to the platoon. Already 3 men short from the previous battle, but with 2 now back from hospital, this resulted in the platoon being 4 men short, with 1 in hospital for the next battle.

COs opinion of Lt. Kenneth Reid increased to 3, which will give the Australians +1 support point next game. The men's opinion stayed at 1. Hard to please. Reid's outlook improved from popular to brave which will give +2 on the Force Morale role next game.

With 24 men and 2 squad leaders killed the Japanese had sustained a lot of casualties. Onishi-san had been knocked out more than 2 times. The result would be 12 dead men, 6 in hospital for the next battle and 6 walking wounded returning immediately. In addition, the 2 recently promoted squad leaders Amatatuda-san and Yatamura-san were dead or invalided out of the campaign. A third (Onishi-san) would miss the next battle. 3 men would need to be promoted to replace them.

Despite the ability to receive replacements for the enlisted men before the next battle, having 3 squad leaders with only 1 command point each would hamper the Japanese. More importantly, a single wound would kill them. This would make the Japanese platoon fragile.

So Leith will bring in a fresh Japanese platoon for the next battle which would again be on map 2.
Saturday, 7 April 2018

MALAYA 1942 CAMPAIGN - TURN 2


I really like the idea of some background to help flesh out the campaign. We did not have enough time at the end of the first game to roll for some of the campaign background and effects as listed in ‘At the Sharp End’ and Len Tracey’s ‘Malaya 1942 campaign’ rules. So we sorted it out between games.
Chain of Command Malaya Campaign Turn 2


JAPANESE PLATOON BACKGROUND

After their loss in the 1st battle, the Japanese replaced their platoon with a fresh one. So there was no need for background on that platoon. The new platoon was:

Rikugun (senior leader) Fujita-san - Thoughtful, average appearance, 25 years old. Sponsored by some senior generals into officer academy, so there are high expectations with a lot of pressure to succeed.
Gunsō (sergeant) Haregawa-san. Also 25 years old. A fisherman from a busy coastal village who was called up.

Rifle squad 1 leader Aoki-san. 27 years old. From the same fishing village as Haregawa-san, who pulled some strings to make this happen.

Rifle squad 2 leader Matsuda-san. 27 years old. An unwilling conscript, but has hidden this so well from his officers it allowed him to achieve promotion to squad leader. This conflicts him as he has pride in doing a good job.

Rifle squad 3 leader Kojima-san. 26 years old from an old samurai family that has become destitute. He hopes to die gloriously in battle to make his ancestors proud.

Grenade discharger squad leader Onishi-san is 25 years old. A veteran of the China campaign, although proud to serve, is becoming fatigued from long years of campaigning.


AUSTRALIAN PLATOON BACKGROUND

Rolling for the Australian force also produced some interesting results.

Lieutenant Kenneth Reid (platoon leader) is only 18 years old, but claims to be older and his superiors have not realised. He was promoted in the field less than a month ago, following the death of his commander. He has retained the position due to his tenacious leadership of this platoon at the battle of Gemas. He began this current campaign feeling ‘secure’ and has now improved to ‘sociable’ due to winning last week’s battle.

Sergeant Gary Turner is an experienced army man at 46 years of age. Originally a stockman, he has no problem sleeping rough.

Acting Corporal Brian Evans is the new section 1 leader, following the death of his predecessor in the first battle. He is 23 years old and was a bank clerk in civilian life.

Corporal Colin Moore heads up section 2. He was a city labourer in Sydney and was an early volunteer. He is 27 years old.

Corporal William Colling, leading section 3, is 26 years old and was a grocer’s assistant in Brisbane.


MAP

The battle was to be fought in the same general location as the first one. Leith had the choice of attacking in the same position or moving the attack to either flank. He chose to attack along the road again (was this an indication he wanted to use another tank?).

To provide some variety we decided to re-orient the tabletop as shown in the map below, so that flanking moves were more possible:

Chain of Command Malaya Campaign Turn 2
Malaya 1942 Campaign - Map - Turn 2 Battle 2


SUPPORT

Again we kept the choice of support secret from each other at the start of the battle.

Japanese support
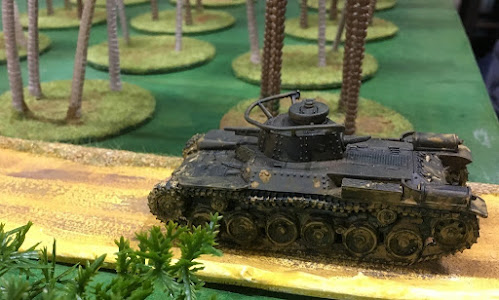
  • Leith was able to afford a better tank; choosing a Type 97 Chi-Ha. This is a medium tank with a 57mm main gun and 2 x 7.7mm type 97 machine guns. The armour varies from 8 to 25mm thick. It has a crew of 4.

Australian support
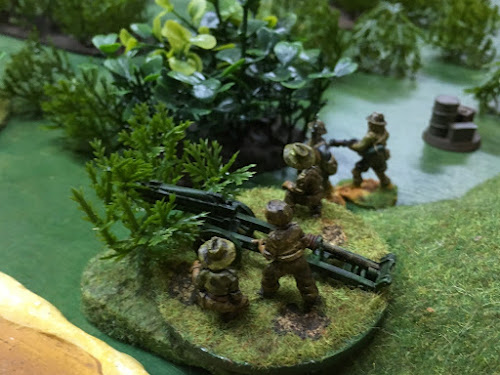
  • 2-pdr anti-tank gun with 5 crew and Junior Leader.
  • Adjutant to help organise the arrival of the troops.
  • 2" mortar team.


FORCE MORALE

Feeling confident after the last game, the Australians rolled well for a Force Morale of 11.
The Japanese start the campaign with a +1 to the die roll. They gained a Force Morale of 9.


PATROL PHASE

Leith chose to use 3 rather than 4 patrol markers. Again the aim of the Australians was to close down the Japanese as quickly as possible. In the campaign the Japanese can move their patrol markers 14" and can be up to 14" apart to represent their preparedness for this campaign. The Australians use the standard 12" patrol distance.

In the photo the white circles show the position of the Japanese jump-off points and the blue the Australian.

Chain of Command Malaya Campaign Turn 2


BATTLE

Turn 1 Phase 1
  • The Japanese force started with initiative due to the campaign, despite starting with a lower Force Morale in this game.
  • Rolling 1, 2, 3, 4, 6 the Japanese brought in the medium tank. Leith wanted to bring the tank in early and advance it faster than in the last game, to pressure the Australians.
  • Gunsō (sergeant) Haregawa-san arrived and brought in the 1st rifle squad, placing them on overwatch. After a slow deployment due to command rolls in the last battle, Leith was taking no chances this time around.
Chain of Command Malaya Campaign Turn 2
  • Countering, the Australians brought in a 2-pdr anti-tank gun. Early success caused 2 net hits: giving the tank crew 2 shock and killing the driver. This would require 2 activations in subsequent phases for the hull machine gunner to replace the driver.
  • Upon arrival the 1st Australian rifle section was effective in dealing 2 kills and 2 shock to the 1st Japanese rifle squad.
  • Overwatch fire from the Japanese was not overly effective - only putting 1 shock back onto the Bren team.

Chain of Command Malaya Campaign Turn 2

Really a stripped down 25-pdr model but being used as a 2-pdr for this scenario

Turn 1 Phase 2
  • Japanese command roll of 1, 1, 2, 4, 6. Hasegawa-san removed 2 shock and ordered the 1st rifle squad to open fire, inflicting 1 more shock on the Bren team. Should have been only 1 shock removed as the Gunsō only has 2 command points. Something to remember for next game.
  • The tank commander ordered the hull machine gunner to start replacing the driver. He then fired the main gun to put a shock on the anti-tank gun.
  • The Japanese 2nd rifle squad was brought in to attack the anti-tank gun. Their fire surprised the crew, wiping out 4 and giving them 1 shock. The Junior Leader somehow survived the onslaught. All this from only 6 hits. Leith understandably was quite pleased with my roll. I was speechless for a few seconds, then we both had a good laugh.
Chain of Command Malaya Campaign Turn 2

  • The Australian command roll was 2, 3, 3, 4, 4. The 2nd rifle section was brought in to protect the one crewman and Junior Leader left operating the anti-tank gun. Their fire was effective; causing 3 shock, 2 kills and the Japanese Junior Leader lightly wounded. No effect on the Japanese Force Morale.
  • Sergeant Turner removed 2 shock from the 1st Bren team. Shooting from the 1st section caused 1 shock and lightly wounded Junior Leader Matsuda-san. 2 Japanese leaders now only had 1 command point each. Once again Leith rolled low and with the -1 adjustment, no effect on Japanese Force Morale.


Turn 1 Phase 3
  • Japanese 1, 1 ,2 ,6, 6 for command. Combined a 1 and a 2 to activate the tank, completing the change of driver. Ineffective fire against the anti-tank gun.
  • Nothing else done, but the Japanese had the next phase due to the double 6.

Turn 1 Phase 4
  • Japanese 1, 3, 5, 5, 6. Some Chain of Command points and a mortar team from the grenade discharger squad brought on. We found the organisation of the Japanese grenade discharger squad confusing as it was broken into 3 teams, but each of the rifle squads had no sub-teams. According to Len Tracey the knee mortars always operated together and fired at the same target. So perhaps they should be treated as a single squad with no teams. In the rules they fire as rifle grenades although there is debate on the Chain of Command forum about whether they should be treated as mortars or rifle grenades. Len Tracey also indicated that the large size of the squad was because most of the men were keeping ammo up to the knee mortars. Due to this we allowed the Japanese in this campaign to ignore the rule where rifle grenades run out of ammo if fired in 2 consecutive phases.
  • Australian command roll of 1, 1, 2, 3, 5 provided their first Chain of Command point. Anti-tank gun hit the tank but did not penetrate. 2nd section shot, putting 1 kill on the Japanese 2nd rifle squad.
  • Acting Corporal Brian Evans ordered his squad to fire on the Japanese 1st rifle squad with good effect; producing 2 kills.
Chain of Command Malaya Campaign Turn 2

Turn 1 Phase 5
  • Japanese rolled 3, 5, 5, 5, 5 which gave them their first Chain of Command die.
  • Their 2nd rifle squad fired through the jungle for no effect on the Australian 2nd section. Colin Moore breathed a sigh of relief.
  • Japanese used the Chain of Command dice to interrupt so they could fire at the anti-tank gun to try and finish it off. The high explosive (HE) round resulted in a kill on the Bren team, but Colin survived unscathed.
  • The anti-tank gun hit the tank again, causing 1 net hit. This resulted in 1 more shock and no activation next phase.
  • Concentrated Australian fire was effective, causing 4 shock plus 2 kills on the Japanese 2nd rifle squad.

Turn 1 Phase 6
  • The Japanese command roll of 1, 1, 1, 5, 6 allowed them to start their next Chain of Command die.
  • Combining the 1s allowed Leith to bring in the 3rd rifle squad to the east of the road, to aid Matsuda-san’s squad. They fired onto the Australian 2nd section and the anti-tank gun, killing the last gunner and leaving only the Junior Leader to serve the gun. A heroic but risky choice had to be made whether to operate the gun with only the Junior Leader and risk more Force Morale loss or move the Junior Leader to safety.
  • 1 killed plus Colin Moore wounded. Bad roll for the Australians with -2 Force Morale. Obviously Colin was popular with his men. Or maybe he owed them too much money from two-up: a coin-tossing betting game popular with Australians of that era.
  • The Australians hit back with a command of 2, 3, 3, 4, 5. 1 kill plus 1 shock on 3rd Japanese rifle squad. Same result on their 1st rifle squad.

Turn 1 Phase 7
  • Japanese command roll of 1, 1, 2, 3, 5. Not bad. More fire laid down, causing 11 hits. Anti-tank gun hit, so must be the Junior Leader. Also 1 hit on Sergeant Gary Turner, who had been directing the 2nd rifle section. No activation for the rest of the turn. Bad Things totalled -2, so Force Morale was down to 7 for the Australians.
  • Japanese 2nd rifle squad reduced shock by 2 and shot. 5 shock still on the squad, but the Japanese in this campaign count shock as if they have 2 fewer before determining its effect, so only shot with 1 less die. Due to the heavy cover and difficulty spotting targets in the jungle, there was lots of noise, but no effect from the Japanese shooting.
  • The Australians completed a Chain of Command die. Firing with all 3 sections, they inflicted 3 more shock overall across the squads of their foe.
Chain of Command Malaya Campaign Turn 2

Turn 1 Phase 8
  • Japanese command roll of 1, 2, 3, 5, 5 was interrupted by the Australians to shoot at the tank. 1 net hit brought the shock to 3 as well as removing the lowest dice for flat out movement.
  • Minor casualties were inflicted by the Japanese, although the grenade discharger squad failed to contribute.
  • The anti-tank gun fired again, manned only by the brave Junior Leader. Great rolling gave net 2 hits. Anything but a 6 would cause the crew to bail out. Of course the roll was a 6. The tank main gun was knocked out which was a good thing, but no additional shock. We did not realise until after the game that Leith should have rolled for ‘Bad Things Happen’ when the main gun was knocked out. However, the way he was rolling low for almost all these ‘Bad Things’ rolls it may have meant no effect anyway
  • Fire from the Australians caused 1 kill on 3rd squad. Even more accurate was the fire onto 1st squad. 1 kill, 1 shock plus Aoki-san killed. -1 to Force Morale and the squad pinned.

Turn 1 Phase 9
  • The Japanese command roll of 1, 2, 4, 5, 6 allowed them to wipe out the Bren gun team of the Australian 2nd section, but with the confused fighting caused by the jungle, there was no impact on the Australian Force Morale. Other fire was ineffective.
  • The anti-tank gun hit the tank yet again, but it bounced off the thick mantlet armour.
  • The Australian 1st and 3rd sections advanced cautiously, firing as they went. This resulted in 3 more shock to the Japanese 1st squad, bringing them to a total of 8 shock. Worse for the Japanese was the breaking of their 2nd squad, although with the -1 campaign modifier to the ‘Bad Things Happen’ die roll it produced no effect on Force Morale.

Turn 1 Phase 10
  • The teams, sections and squads were becoming more fragile on both sides, apart from the Japanese 3rd rifle squad since the Australians had been concentrating on breaking the 2nd rifle squad. Some more trading of fire continued. The main impact this phase was the Australian 1st section wounded Haregawa-san. Knowing their commander was injured, Force Morale for the Japanese dropped to 7.
Chain of Command Malaya Campaign Turn 2

Turn 1 Phase 11
  • The Japanese 3rd rifle squad moved forward towards the Australian jump-off point near the abandoned anti-tank gun. Seeing 18" that phase, they fired across the road onto the flank of the Australian 3rd section – causing 1 kill each on the rifle team and Bren team. Fire from the grenade squad was ineffective.
  • As the Australians were about to reply, the Japanese used a Chain of Command dice to interrupt. Their 3rd squad fired on the Australian 2nd section. Unfortunately, the CoC dice was wasted as this shooting had no effect.
  • Buoyed by the poor shooting of the Japanese, the Australians replied. 3 shock pinned the Japanese 2nd squad. Matsuda-san was killed. This time the ‘Bad Things Happen’ roll finally gave -2 Force Morale, so the Japanese were now down to 5. 1 more and they would start losing command dice.
  • On the left, the Australian 1st section moved forward carefully while firing and inflicted 1 shock on the grenade discharger squad. Getting close enough would force the Japanese squad to use their rifles rather than the knee mortars. With no machine gun in their squad the volume of fire advantage would lie with the Australians.

Turn 1 Phase 12
  • Japanese double 6, but nothing else of use. Very frustrating at this critical stage of the battle.

Turn 1 Phase 13
  • Japanese 1, 2, 2, 2, 6. Kojima-san removed shock and led the 3rd rifle squad forward. They were now within 4" of the most forward Australian jump-off point, shutting it down. If they moved onto it and ended the turn, then the Australians would have to roll for ‘Bad Things Happen’.
Chain of Command Malaya Campaign Turn 2
Kojima-san closes in on the Australian jump-off point whilst the Australians temporarily withdraw to the other side of the hill and await reinforcements. The hill is obviously steep since the Australian figures kept falling over. They are meant to be upright

  • Close decision, but the Australians decided to withdraw while their force morale was (just) higher than the Japanese.
  • The Japanese had command problems due to killed and wounded leaders. The jump off points to the west of the road and the grenade discharger squad were under threat but it would probably take a couple of phases for the Australians to press that advantage. To the east of the road the almost fresh 3rd rifle squad were about to move onto the Australian jump-off point and threaten the damaged rifle team which had withdrawn over the hill in an attempt to reduce further casualties.
  • The Australians were thinking about bringing a rifle section across the road to threaten Kojima-san’s flank, but that was a risk as a short move would leave them stranded in the road with a risk of machine gun fire from the wounded tank.
  • Australian Force Morale was 1 higher but with the -1 adjustment to 'Bad Things Happen' rolls the Japanese were harder to drop. So from a campaign point of view the Australians decided they had damaged the Japanese enough. It was risky for them to take too many casualties as they rarely get replacements in the campaign.

WRAP-UP

A fun and very close game at the end and a tough decision for the Australians about whether to withdraw or not.

The Japanese rolling for ‘Bad Things Happen’ was impressive for not losing Force Morale on many occasions.

The Australian shooting was more effective overall than the Japanese.

The Australians were very close to knocking out the tank on 2 occasions, including the first round of fire from the anti-tank gun. A good hit in a later phase would have seen the surviving Junior Leader up for a medal.

However, the deadly fire from the tank in only the 2nd phase of the game nearly wiped out the anti-tank gun early.

Care needs to be taken when deploying jump-off points that they are not too far forward as they risk being overrun.

Chain of Command Malaya Campaign Turn 2

CAMPAIGN IMPACT

The Japanese won the scenario but received 16 casualties plus 2 dead leaders. Next game they would have 2 new squad leaders promoted from the ranks which would only have a command radius of 3" and 1 command point each. If they survived the next game they would become accepted by the men and on a roll of 3 to 6 would become a normal Junior Leader.

With 2 men promoted, casualties and replacements the overall effect would be 5 men down for the Japanese with 4 in hospital who could return to this platoon after the next game.

Fujita-san is now Sociable. CO’s opinion now +1 because of winning but the men’s opinion now -5 due to the high level of casualties. Overall effect is to retain the +1 adjustment to the Force Morale roll at the start of next game.

The Australians received 7 casualties from the main platoon and 5 from the anti-tank gun crew. By having a higher Force Morale and inflicting 50% more casualties (including dead leaders) the campaign impact was not as great for the Australians as it could have been. The result for the Australians becomes a Losing Draw rather than a defeat.

Kenneth Reid is now Popular. CO’s opinion +2 and the men’s opinion +1 due in part to the lower casualties. Overall effect is to give this platoon a +1 adjustment to the Force Morale roll at the start of next game.

For the next game we move on to map 2 which is based on scenario 2 from the rule book.

Sunday, 1 April 2018

MALAYA 1942 CAMPAIGN - TURN 1


Leith and I kicked off the Malaya 1942 campaign for Chain of Command, published by TooFatLardies in their Christmas 2015 Special pdf.

The first battle location in the campaign is based around Scenario 1 from the Chain of Command rule book, with some appropriate modifications. This scenario has the two armies probing to check the strength and location of the opposition. The scenario is won by one side forcing the withdrawal of the other.

The Australians are trying to utilise a blocking position in a defile against the Japanese; but have had little time to prepare due to the rapid Japanese advance. Blitzkrieg at its best.


MAP
Chain of Command Malaya Campaign Turn 1
Malaya 1942 Campaign - Map - Turn 1 Battle 1


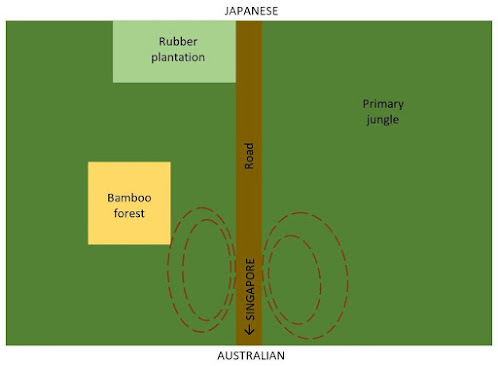
The table was to consist mostly of Primary Jungle, with a road down the middle. The road ran through a defile, which made a good ambush position. There were 2 rolls required on the campaign scenery table. For us these proved to be:
  • Rubber plantation. We then rolled randomly for size – 24 x 24“
  • Bamboo forest. Rolled randomly for size - 13” x 13”
There are no rules for positioning terrain in the campaign, so we decided to simply roll a D6 for position along the table and another D6 for position across the table. Leith and I agreed that the rubber plantation would be adjusted slightly, if needed, to have easy access to the main road.

So the plantation would have the main road either along one edge or through the middle of it. We also decided that the plantation would not be on the defile. The dice rolling worked out fine. No adjustment of position for the rubber plantation or bamboo forest was necessary.

Above can be seen the resulting map. The dotted lines show the hills that create the defile.


SUPPORT
Japanese support
  • Leith decided it was appropriate to take a tank as support to represent the Japanese use of armour in this campaign. All he could afford was a Type 95 Ha-Gō light tank as support for his infantry platoon. Armed with a 37mm main gun and 2 x 7.7mm type 97 machine guns, the armour is not very thick. It has a crew of 3: commander, hull machine gunner and driver. However, it is still a tank!
Australian support
  • Vickers MMG team with 5 men. For some extra firepower.
  • Boys anti-tank team with 2 men. I decided to take an extra team to supplement the standard platoon one, since these teams are quite fragile and the only anti-armour in the force at this stage. This was just in case any tanks should appear.
A great thing about Chain of Command is that support options can be chosen secretly. We did this as it adds to the fun. And with the way deployment works, you may not know until well into the game what your opponent has chosen.


PATROL PHASE

Chain of Command starts with a patrol phase before any troops are placed on the tabletop, to determine where your jump-off points will be. These points are where you are able to deploy troops when you get the right command roll and are also ready to bring on a team, section/squad or support option.

Both sides started with 3 patrol markers on the road at their respective edges and pushed forward quickly. The Australians locked down the Japanese patrols quickly to ensure they did not obtain a deep outflanking position. In the early part of the war, the Japanese are allowed to move their patrol markers further each turn, recognising that their doctrine stressed mobility and flank attacks.

In the photo the 3 white circles show the position of the Japanese jump-off points and the 3 blue circles the Australian jump-off points.

Chain of Command Malaya Campaign Turn 1


BATTLE

Turn 1 Phase 1
  • The Japanese started with the initiative, bringing in a mortar team and a senior leader to the east of the road.
  • The Australians were able to bring in 2 Junior Leaders with their sections to the east of the road, trying for an early advantage. Both sections were placed on overwatch.
Chain of Command Malaya Campaign Turn 1


Turn 1 Phase 2
  • The Japanese 1st and 2nd rifle sections jumped off about 15” from the Australians but did not spot them, so could not fire on the Australians. Peering through the trees the Australian 2nd section saw both Japanese rifle sections and conducted overwatch fire; inflicting an impressive 3 dead plus 3 shock on the Japanese 1st section (ouch) and 1 pin on the 2nd section.
  • In the primary jungle the visibility is 12” + 1d6”. The Japanese rolled a 1 and a 2, the 13” and 14” not enough to spot the Australians. The Australians rolled a 4, so their 16” visibility for this phase allowed them to fire at both Japanese sections.
Chain of Command Malaya Campaign Turn 1

  • Both Australian sections moved tactically and fired (with half dice) trying to press their early advantage. The 1st section was now just within 12”. This not only guaranteed visibility, but also brought the sub-machine gun (SMG) within range.
  • The Australian 2nd section rolled a 5 for visibility. This resulted in more impressive fire, with 4 more Japanese casualties and a Junior Leader unconscious. This brought the Japanese 1st rifle section to around half strength already.
  • The Australians brought in their 3rd rifle section to pile the pressure on, deciding to press the advantage rather than finessing.

Turn 1 Phase 3
  • After a slower start for the Japanese, Chain of Command points were now 4 for both sides. When you get to 6 you are allowed to spend it on special actions. you do not have to do this straight away, and can even save more that one Chain of Command (CoC) die until later in the game.
  • The Japanese knee mortars were called in by their 1st rifle section. They opened up on the Australian 1st section, shredding the canopy as the shells rained down but doing little else. The distraction allowed the Japanese 1st rifle section to inflict a kill on the Australian 1st rifle team, 2 shock on the Bren team and a wound on the Junior leader who was instructing the Bren gunner. The men were unfazed by his wound (rolling a 1 for ‘Junior Leader wounded’ on the ‘Bad Things Happen’ table).
  • The Australians rolled 3, 3, 6, 6, 6 for command. The triple 6 meant end of turn after this phase, which had no effect on either side at this point of the game. End of turn will remove any smoke, overwatch markers, some pin markers, re-awaken unconscious leaders and rout any still broken units.
  • The Australian 1st section fired and the 2nd section moved tactically then fired at half effect. The result of all this was only 1 shock on the Japanese; so no significant benefit.
Chain of Command Malaya Campaign Turn 1


Turn 2 Phase 1
  • Australians started the first phase of the new turn because they had rolled the triple 6 in the preceding phase. They rolled 2, 2, 2, 4, 5 for command. They were now up to 5 on their CoC die.
  • Firing at Japanese 1st section gave 1 dead, 1 shock and their Junior Leader out for the rest of the turn. Once again, no bad thing happened. Both sides had been rolling 1’s for the wounds on their leaders so far, avoiding any loss of Force Morale points. Perhaps the jungle had stopped the men from knowing about the hits on their leaders.
  • The Japanese 1st rifle section was now pinned. This means they accumulated shock points double or more the number of men left in the team or section/squad. Units that are pinned cannot move, fire and fight at half effect, but count as if in one level of cover higher due to hugging the ground.
  • With a 1, 1, 3, 3, 6 for command the Japanese shot well; causing 2 dead, 2 shock and a wound on the leader of the Australian 1st section. Also 2 dead in the Australian 2nd section.
  • Despite this success, with the Japanese still feeling behind in the firefight, their 3rd rifle section came in to try and tip the balance.

Turn 2 Phase 2
  • The Australians rolled 5, 5, 6, 6, 6 for command. A Chain of Command dice complete and a second one started.
  • The triple 6 again meant end of turn after this phase. Unfortunately for the Australians, all it did was allow the Japanese 1st rifle team leader to regain consciousness! All the double and triple 6’s rolled by the Australians had not amounted to much so far.
Chain of Command Malaya Campaign Turn 1


Turn 3 Phase 1
  • With another phase, the Australians rolled 1, 5, 5, 6, 6. Chain of Command dice mounting up for them, but otherwise nothing could be done.

Turn 4 Phase 1
  • Starting turn 4, the Australians rolled 1, 2, 2, 5, 6. Yet more Chain of Command points, but the Australian commander was not sure how best to use them at this stage.
  • The Australians continued to tactically advance their squads alternately. The overall fire was effective, adding more kills and shock on the front two Japanese rifle sections.
  • The Japanese 1st section broke and retreated deep into the jungle, well out of sight. The leader of the 2nd rifle section was wounded. Japanese force morale was now down to 8, but a long way from being a problem.
  • The Japanese finally got to act after the multiple Australian phases. With a 1, 2, 3, 4, 4 both senior leaders were brought into play. This was to try and give the attackers more flexibility in command and quicker removal of shock. But their firing was lacklustre, only causing one casualty in the Australian 1st section Bren team.
  • Leith brought in the Japanese light tank at the start of the road, representing a scout for an armoured column. Seeing this, I was glad I had spent some support points on a second Boys anti-tank rifle team.
Chain of Command Malaya Campaign Turn 1


Turn 4 Phase 2
  • Despite all the shooting that occurred this phase, the result was ineffective from both sides.
  • Leith raced the tank up the road. Unless the Australians could stop it leaving the area, they would have to withdraw.
Chain of Command Malaya Campaign Turn 1


Turn 4 Phase 3
  • The Australian command roll of 1, 2, 2, 2, 4 allowed them to bring on the HQ Boys anti-tank rifle team. Lurking behind a jungle bush, they hit the tank 2 to 0, putting the MMG out of action for the game and 2 shock on the tank. A total of 3 shock would stop any further advance of the tank. 4 or more shock would result in the crew bailing out for the rest of the game. It is possible to reduce shock using the Junior Leader of the tank if they get to use the correct value of command dice.
Chain of Command Malaya Campaign Turn 1

  • The Australian Bren and rifle fire did not hit many times, but it was enough. Although it only caused a few more shock and kills, it was a perfect storm for the Japanese. A rifle section broke. The already wounded Junior leader was killed and a senior leader was wounded.
  • Japanese Force Morale was now at 4. They decided to withdraw, particularly as the Australians had a Chain of Command dice which they could use to end the turn and rout the senior leader attached to the broken rifle section. This would result in further loss of Force Morale.
Chain of Command Malaya Campaign Turn 1


CAMPAIGN IMPACT

A good start in the campaign for the Australians, stemming from some very decisive early rounds of fire from which the Japanese never really recovered.

Due to losing the battle, the main Japanese commander will replace this losing platoon with a new full-strength one. The losing Japanese platoon leader may not have much of a future.

Because the Australians won and had a significantly higher force morale, their casualties were reduced. Being left in possession of the battlefield, more wounded are able to be rescued and treated. The difference was high enough that the Australians did not lose any rank and file for the next battle.

However, with an Australian section leader a casualty, a fighting man would need to be promoted from the ranks to run his section. The Australians had no replacements available, so this section would be one man down. The inexperienced leader would have a smaller command radius and just 1 command point (instead of 2). If he survived the next battle he had a good chance of becoming an experienced Junior Leader. However, with only 1 command point he has a greater chance of becoming a casualty.

The Japanese would have to attack in the same location the next turn, but they could choose to fight away from the road in an attempt to find a way around the flank of the Australians.